- The Cuevas de Caballero
- Circular Hike Fontanales – Cuevas de Caballero
- General Information on the Circular Hike to the Cuevas de Caballero
- Circular Hike Cuevas de Caballero
- Route Section: Fontanales to Galeote
- Route Section: Lomo de Galeote to El Tablado
- Route Section: El Tablado to Cuevas de Caballero
- Route Section: Cuevas de Caballero to GC-150
- Route Section: GC-150 to Pozo Cañada de la Vieja
- Route Section: Pozo Cañada de la Vieja to Pozo La Solana
- Route Section: Pozo La Solana to Fontanales
- And finally
The Cuevas de Caballero
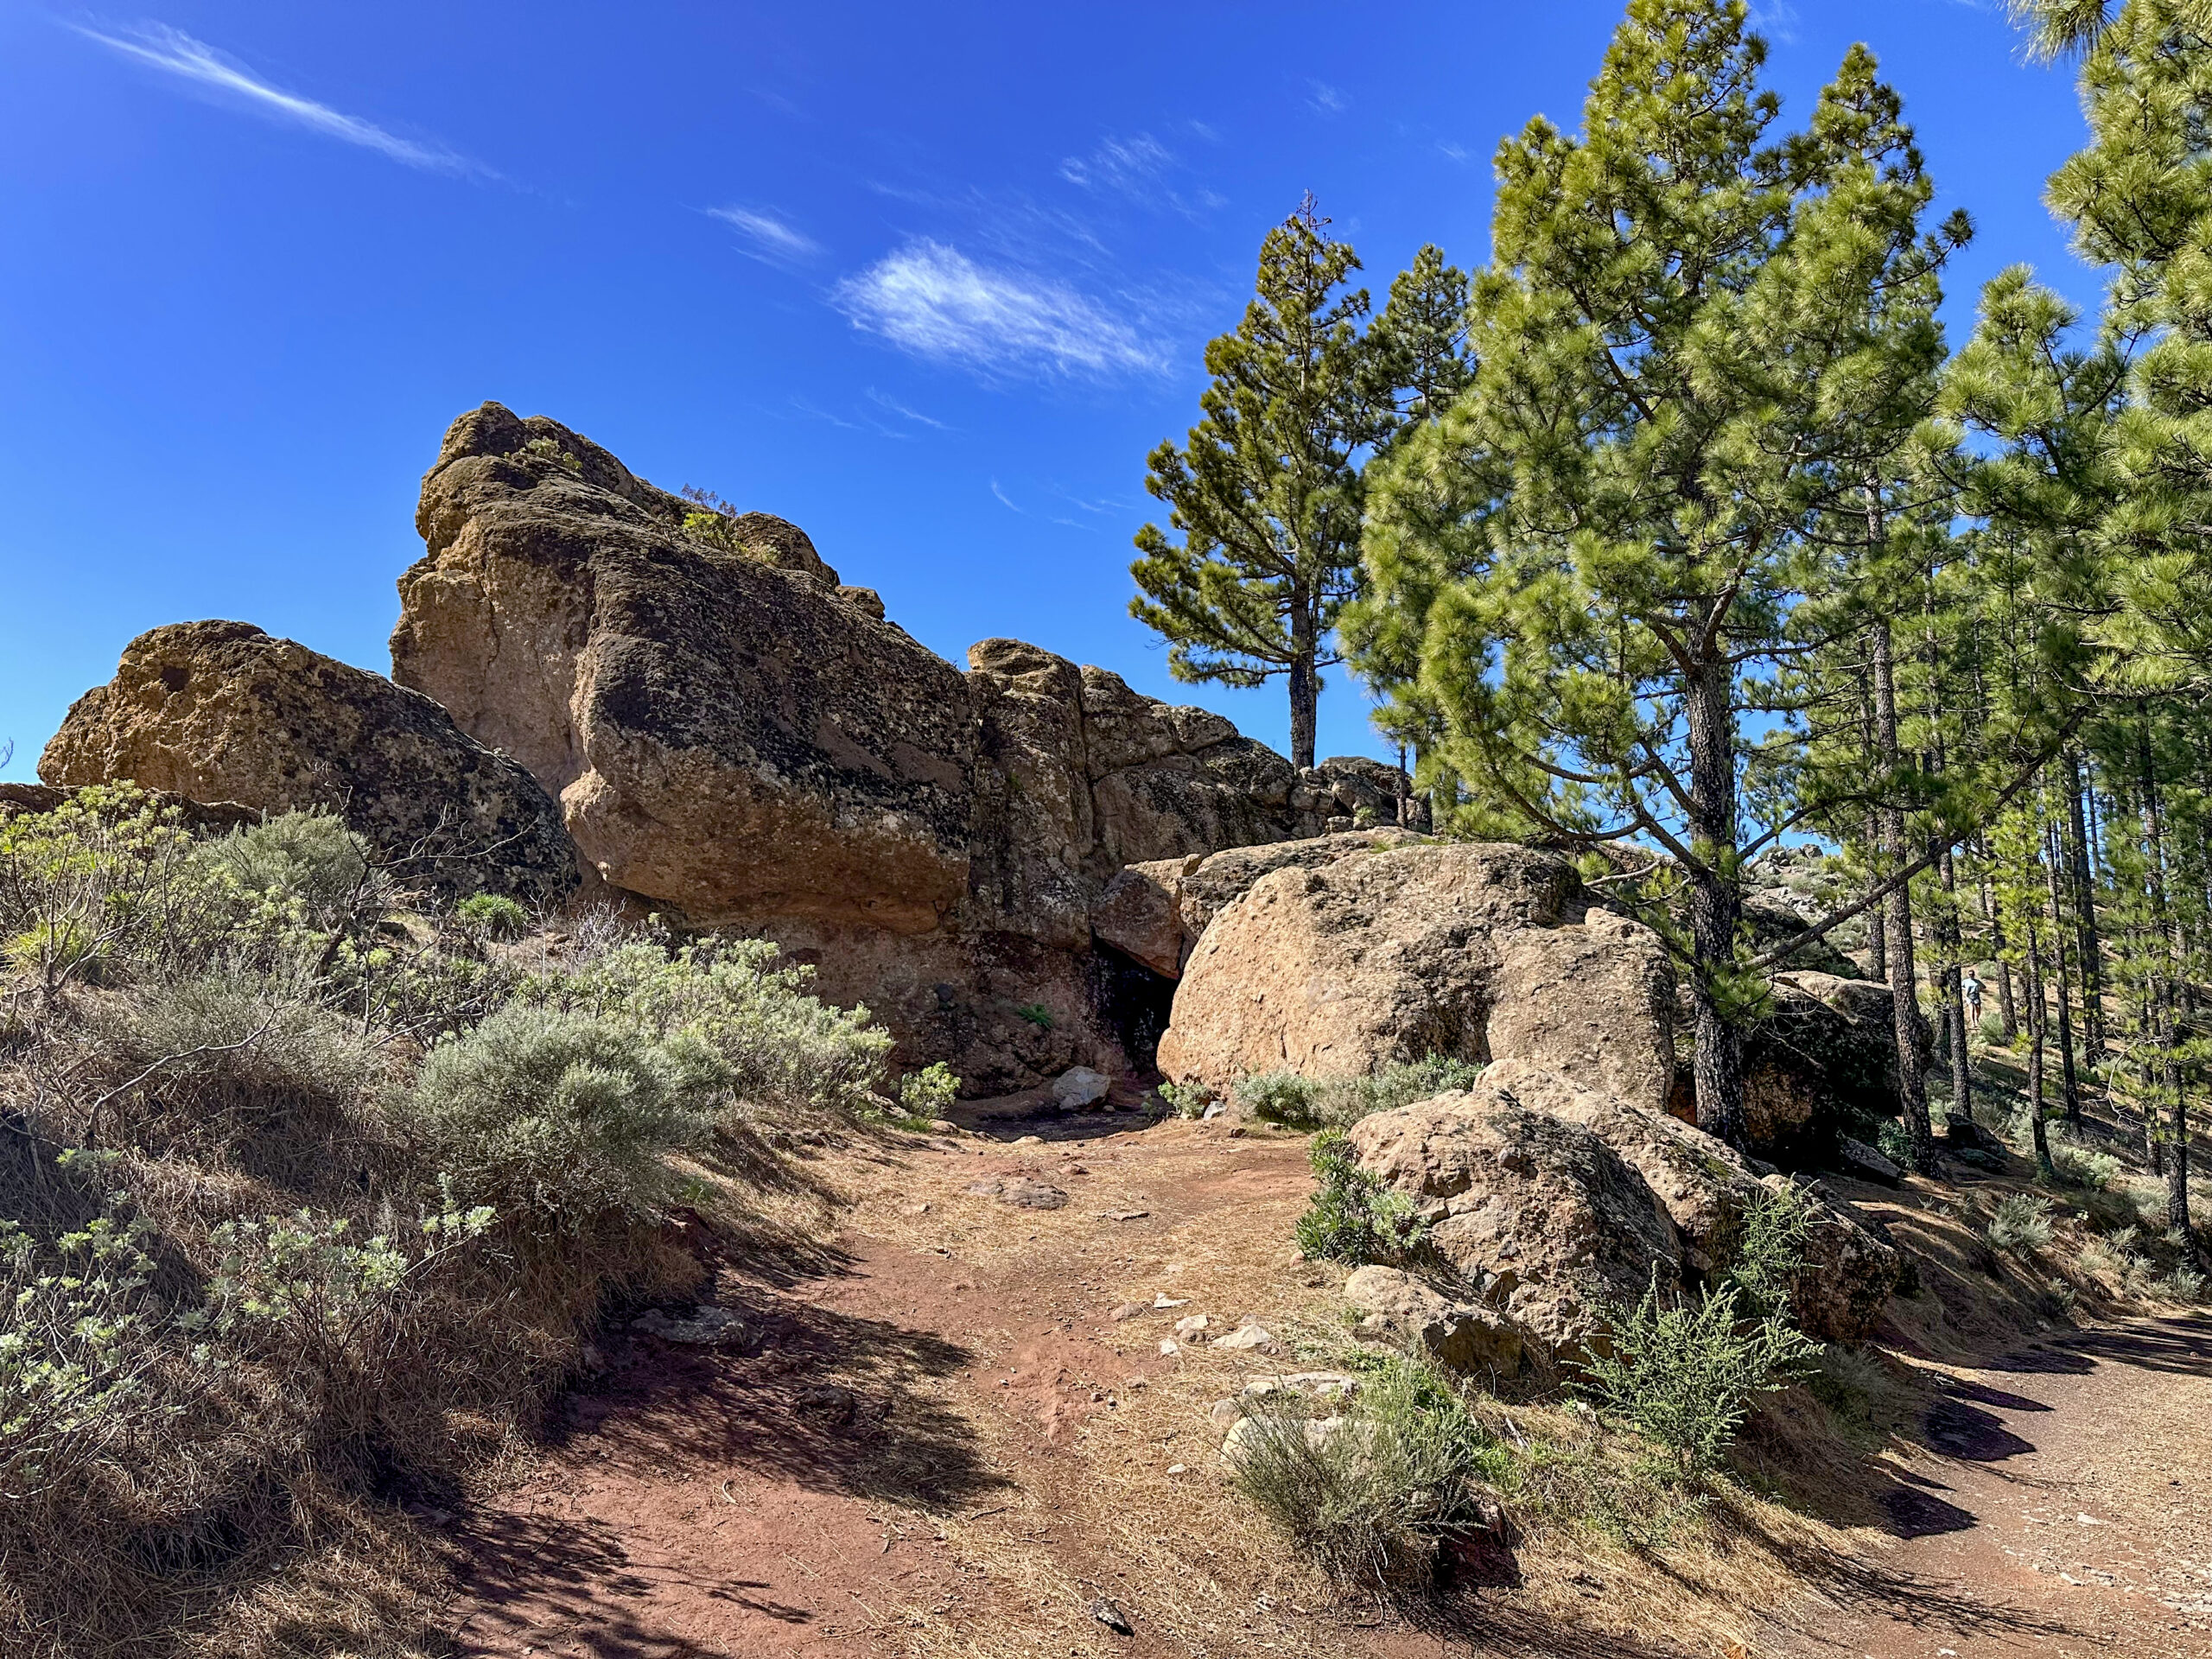
On this beautiful circular hike, you will also reach the Cuevas de Caballero via the upper ridge path. These caves, among many other interesting sights you will encounter throughout the hike, are the highlight of this tour. The Cuevas de Caballero are among the most fascinating cave systems on the island of Gran Canaria. They are located near Artenara, a region known for its impressive rock formations and prehistoric cave dwellings. The caves were likely used by the Guanches, the indigenous people of the Canary Islands.
It is believed that they served not only as simple dwellings but also had spiritual and ritual significance. The region contains numerous archaeological sites proving that the Guanches had a close relationship with nature and the elements. While the name “Caballero” means “knight” or “nobleman,” it is thought in this case to refer to a mythological or spiritual figure. The hike from Artenara to Cruz de Tejeda also passes by the Cuevas de Caballero.
Circular Hike Fontanales – Cuevas de Caballero
However, this wonderful circular tour of approximately 16 kilometres offers much more than just the Cuevas de Caballero. You begin the hike in the small village of Fontanales. From there, you start by ascending towards Artenara and El Tablado. Even during this ascent, you can enjoy breathtaking views. You will walk through pine forests, green meadows, and small settlements. You then reach the picturesque village of El Tablado, which is beautifully situated above the vast Barranco Hondo. From here, you descend into the ravine. The path then continues along and above the Barranco until you reach the Cuevas de Caballero.
This is a good place to take a break. Afterwards, you ascend a little further on well-maintained forest tracks. Eventually, the route descends first through woodland and then through an impressive volcanic landscape. You will pass the well-known Montaña Negro. The final stretch of this truly fascinating tour is the descent through the wild Barranco Agua, passing old wells and galleries. I found this hike via Fontanales so inspiring that I would do it again at any time. I hope you enjoy it as much as I did.
General Information on the Circular Hike to the Cuevas de Caballero
Starting Point and Access
The starting point of the hike is the small village of Fontanales. We began in the village centre, as we were staying there. However, if you arrive via the road to Fontanales, you can start directly at the GC-70 near the village exit towards Artenara.
Getting there by Car
You can reach Fontanales by car via the GC-70 or the GC-75. Parking is available in the village, though it is better to park directly along the GC-70.
Getting there by Bus
Bus line 127 runs from Moya to Fontanales. Further details on bus connections can be found on the official website Guaguaglobal.
Time
I prefer not to give general time estimates for hiking tours, as hiking times are highly individual. We took approximately six hours for this large circuit, including breaks.
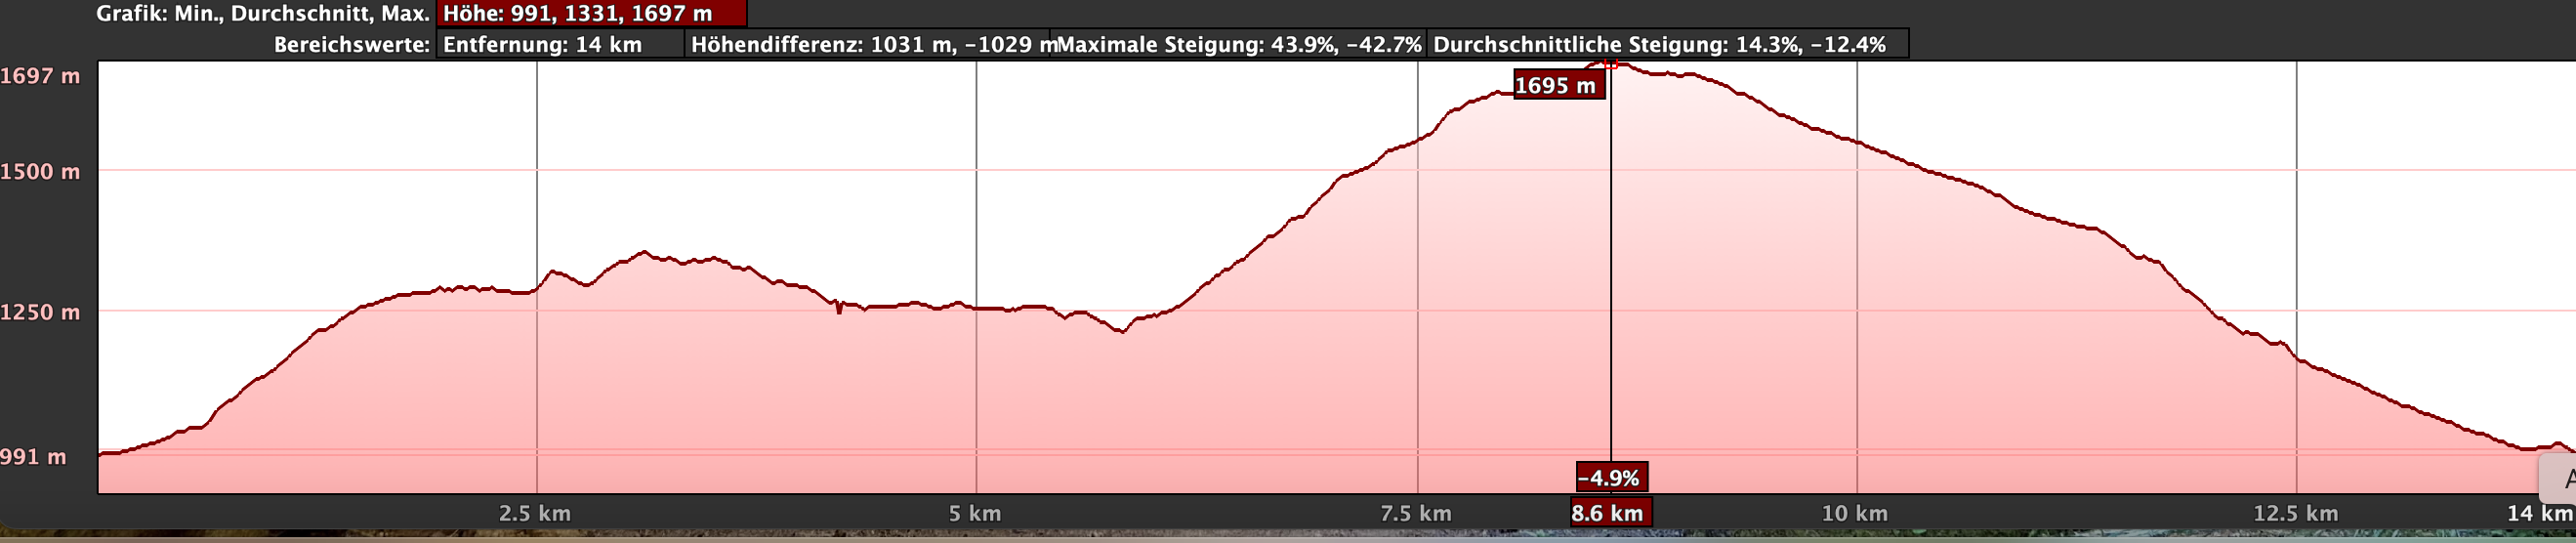
Elevation Gain and Distance
The total elevation gain is approximately 950 metres, and the total distance is just under 16 kilometres.
Difficulty
Throughout the entire route, you will walk on good hiking or forest tracks. Only the descent through the Barranco Agua is somewhat demanding in places, and the path is not always easy to find. However, the direction is clear, so you are unlikely to get lost.
Refreshments
There may be opportunities for refreshments in El Tablado. However, you should definitely bring enough water and provisions with you.
Variants
If you want to see the Cuevas de Caballero but prefer a shorter hike with less elevation gain, you can start from Artenara or Cruz de Tejeda. A description of this route can be found on SiebenInseln.
Other hikes in the vicinity that can be easily combined with this tour are:
Valleseco – Varied Circular Hike in the Green North of Gran Canaria
Tranquil Circular Hike through the Reserva Natural Especial Los Tilos de Moya
Valsendero – through wild gorges and quiet villages
Circular Hike Cuevas de Caballero
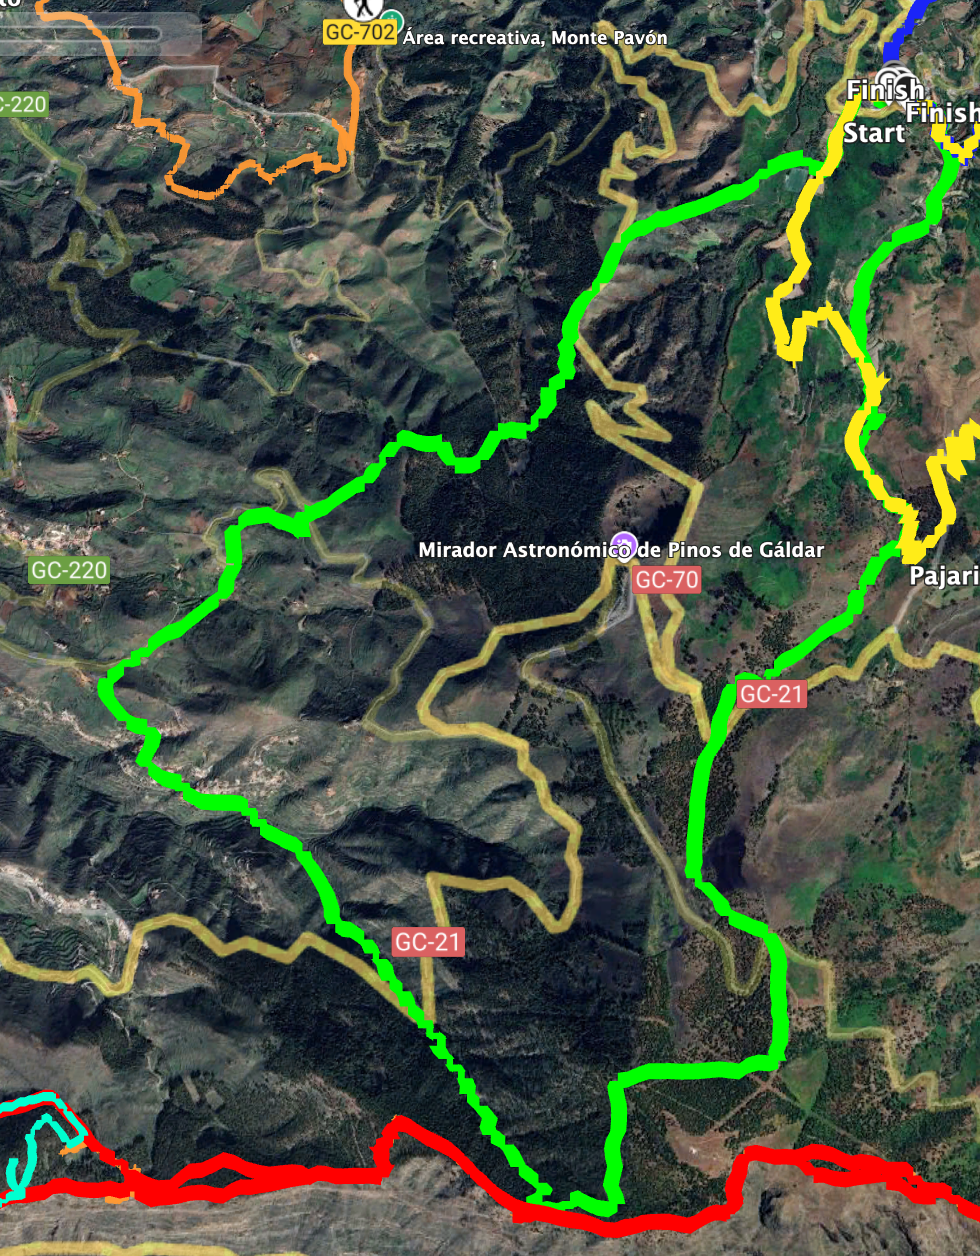
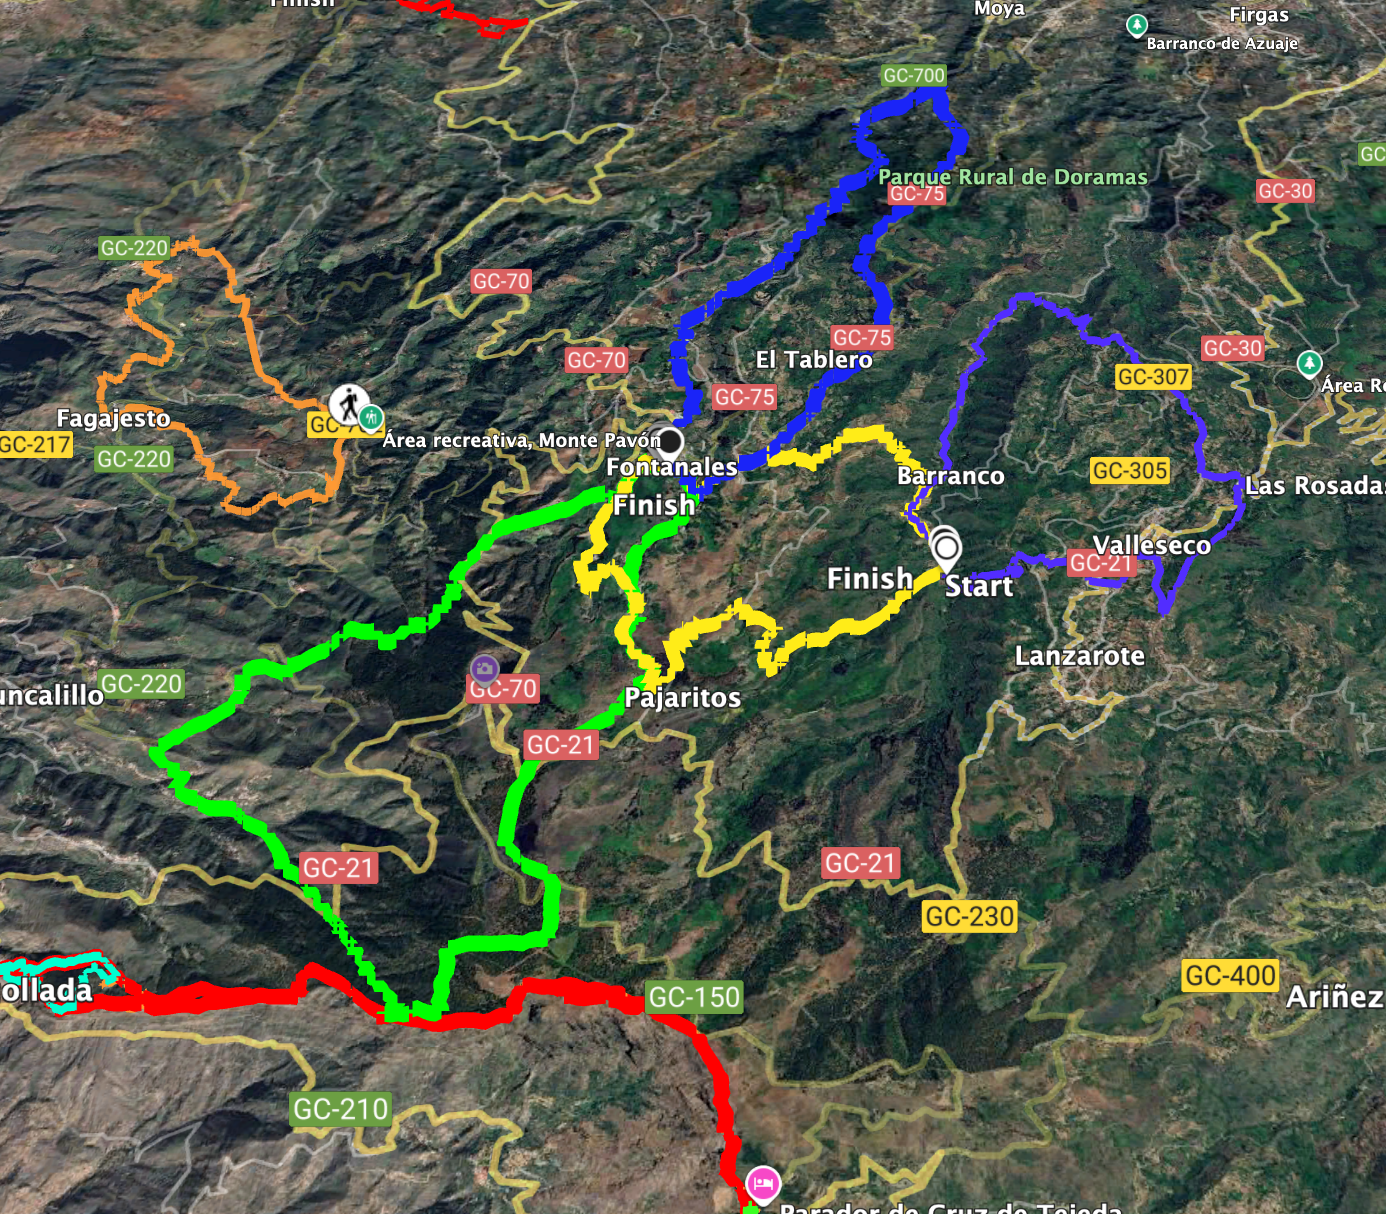
Route Section: Fontanales to Galeote
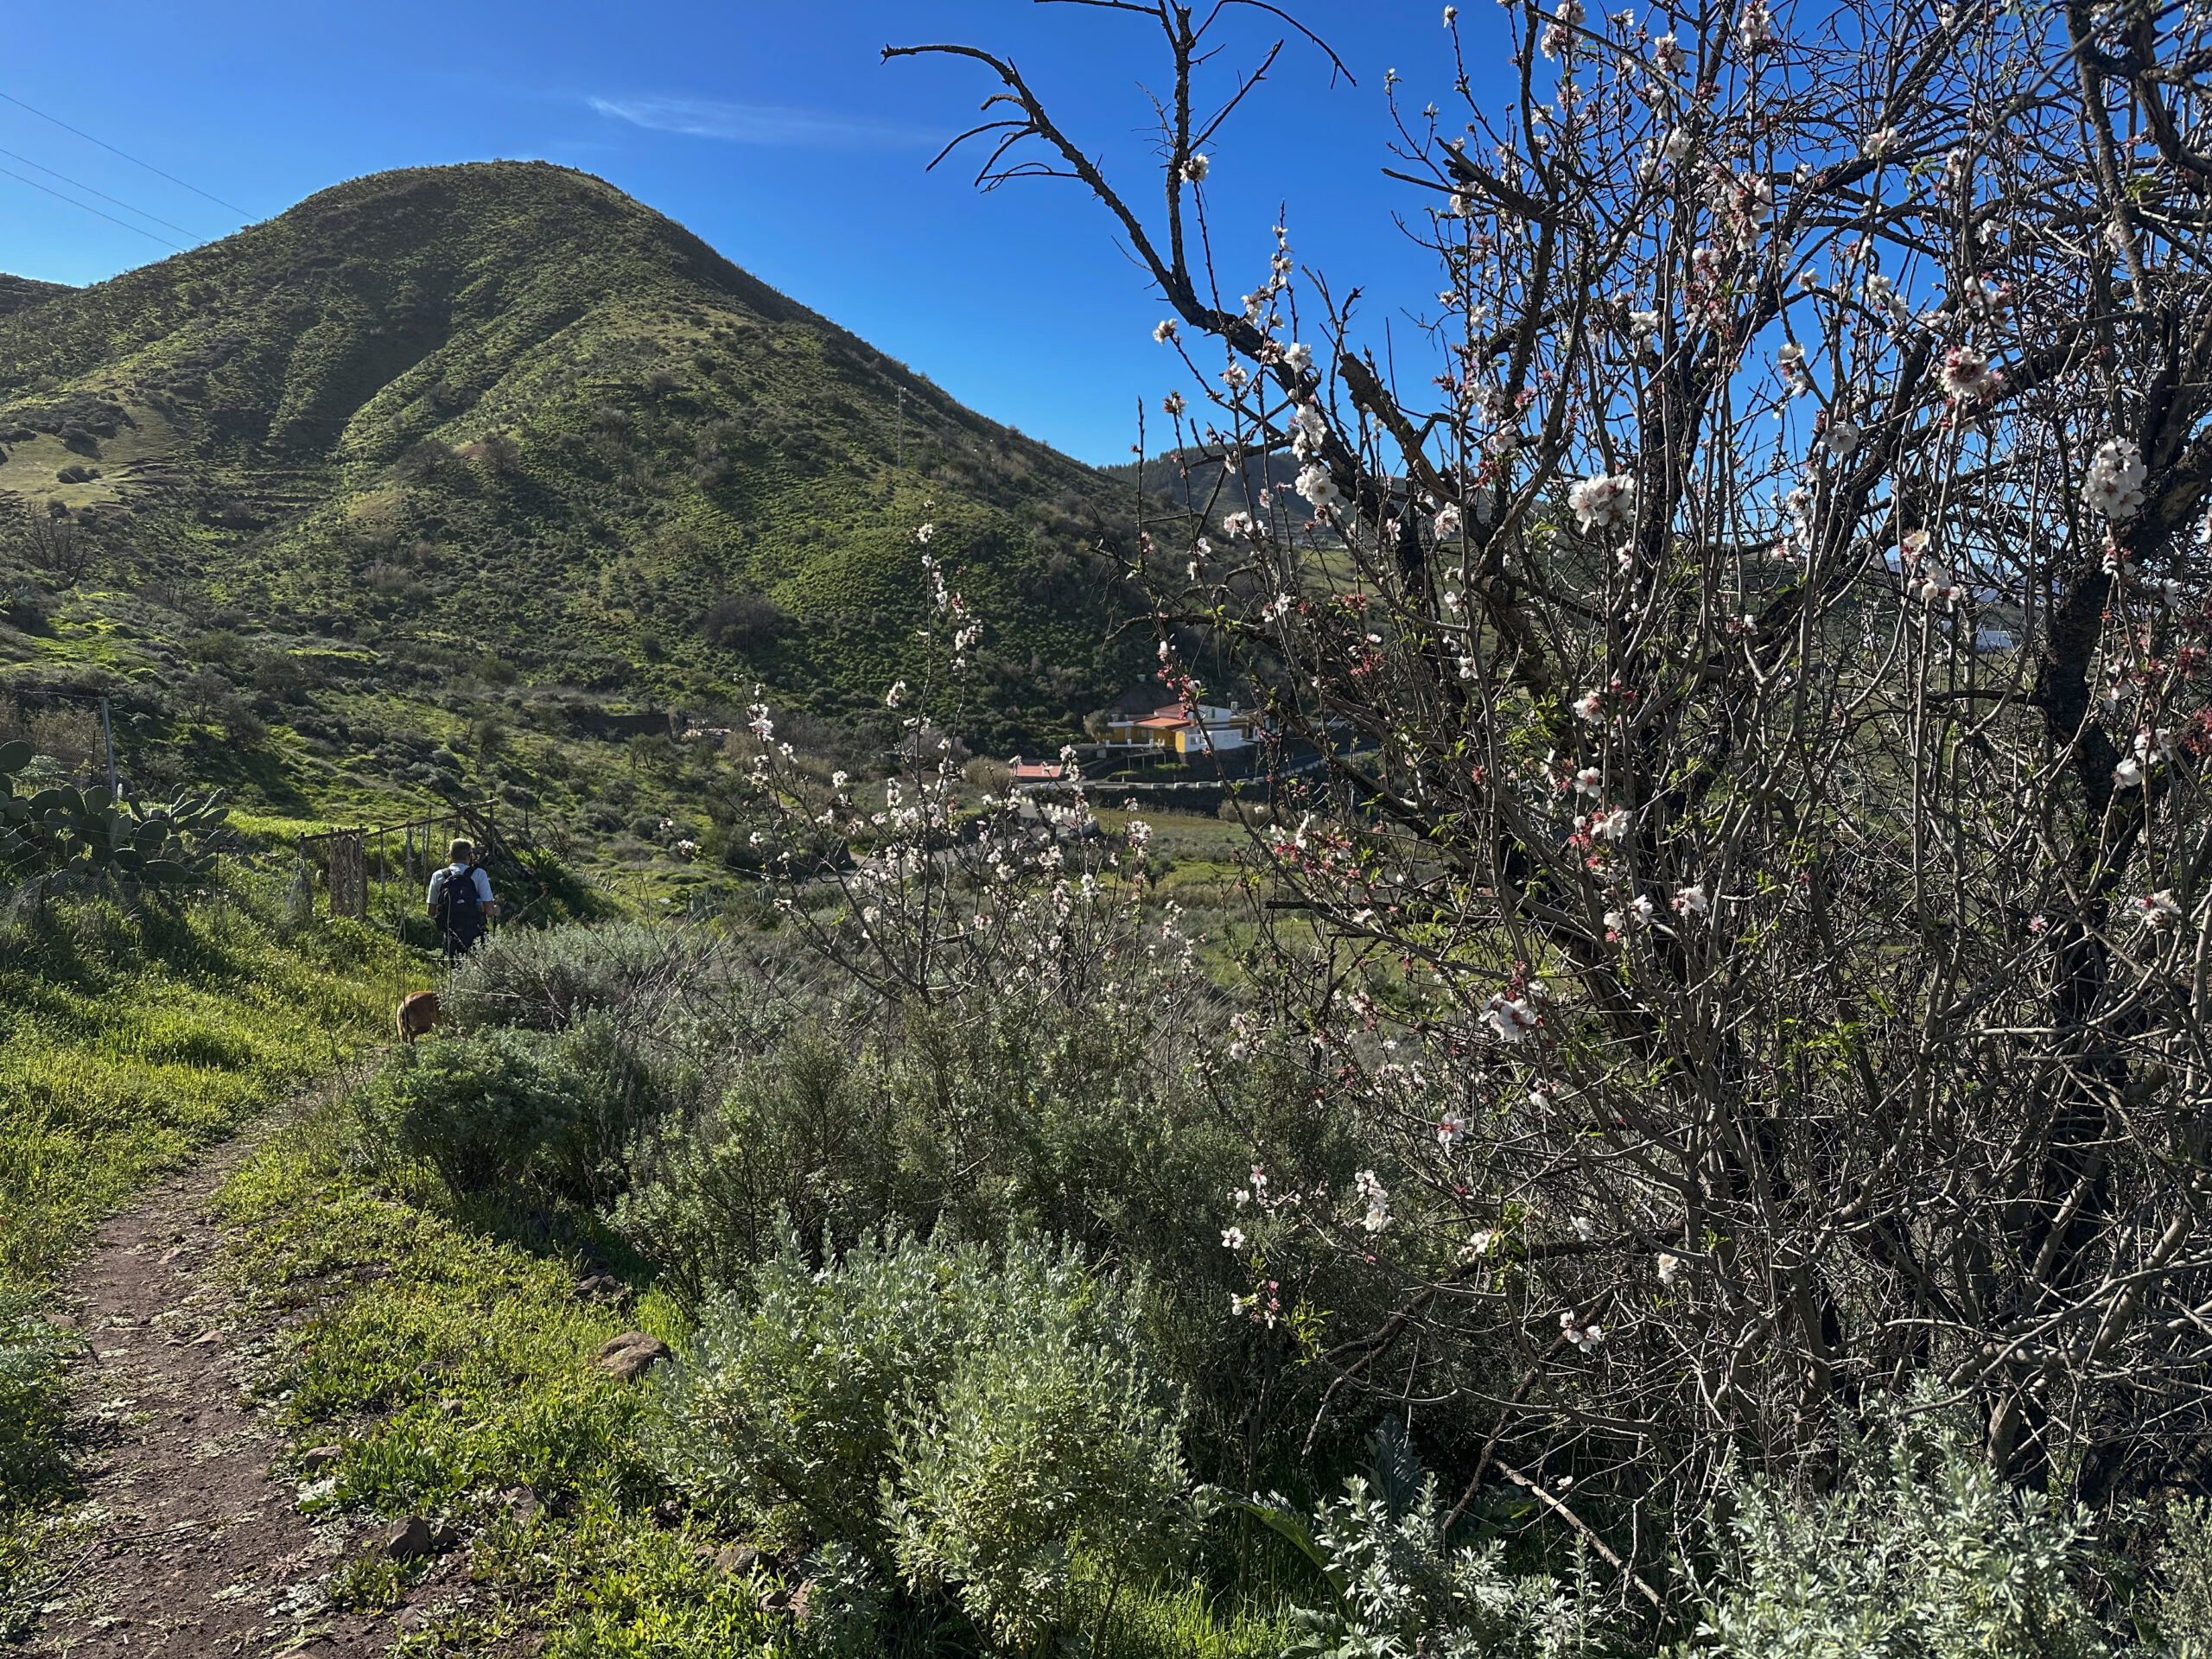
You start your hike in the centre of Fontanales or slightly above the village at the GC-70. Very close to the village exit towards Artenara, the hiking trail S-05 begins, signposted towards El Tablado and Artenara. You follow a wide path uphill along the left edge of the Barranquillo del Brezal. After passing a large building, the trail turns right, crossing the Barranquillo and passing below the sports field of Fontanales. Beyond the sports field, the ascent through the forest begins.

On this long ascent, you can already enjoy beautiful views while quickly gaining altitude. The trail leads to the GC-70, which you follow left for a short distance. In a further left-hand bend of the road, the hiking trail branches off to the right into the forest. You walk along the hillside and successively cross the Barranco Cusano and the Barranco del Sao. Between these two ravines, the Camino de Santiago de Gran Canaria also crosses your path. You continue past an old gallery, climbing further uphill through the forest. At the top, you reach the GC-220 and the viewpoint Lomo de Galeote at 1,320 metres in altitude.
Route Section: Lomo de Galeote to El Tablado
You cross the GC-220 and continue climbing. After a short while, you reach Calle Paraje del Tablado, which you follow left for a short stretch. Here, you have two options. If you prefer, you can stay on this small road until you reach the village of El Tablado. However, we turned right off the road and followed the hiking trail towards El Tablado and Artenara. This path leads in a wide curve downwards towards the GC-220.

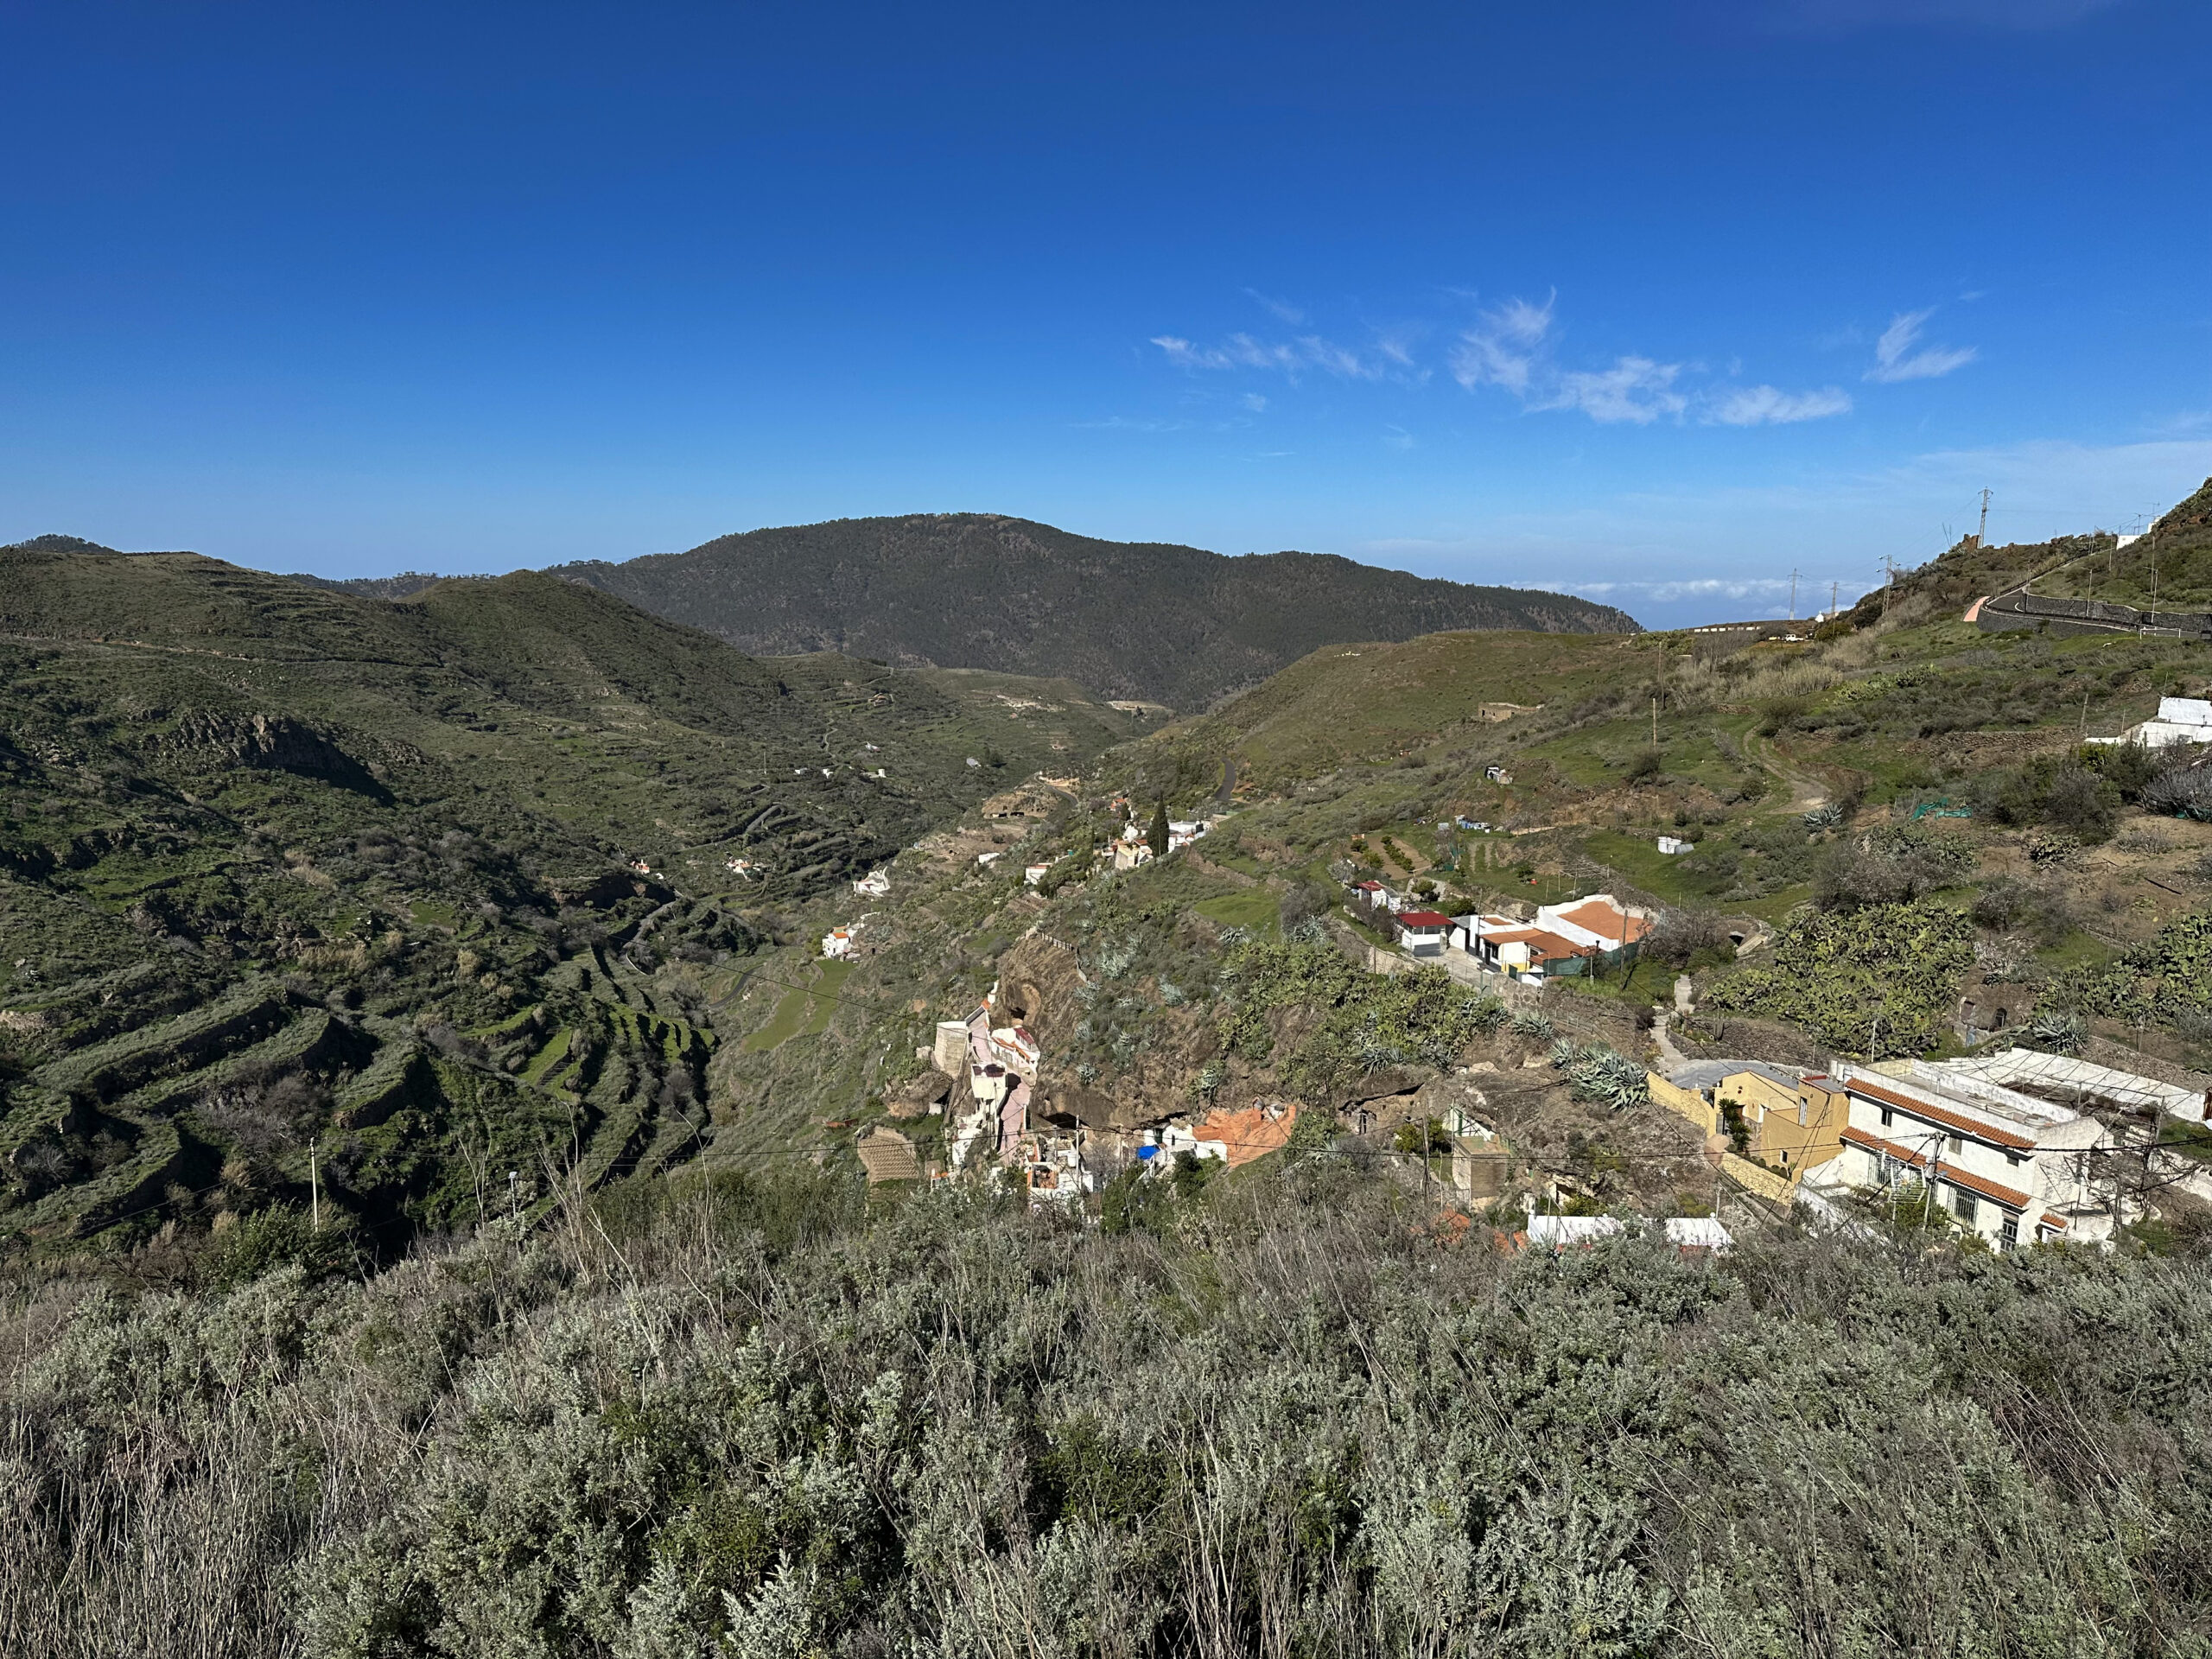
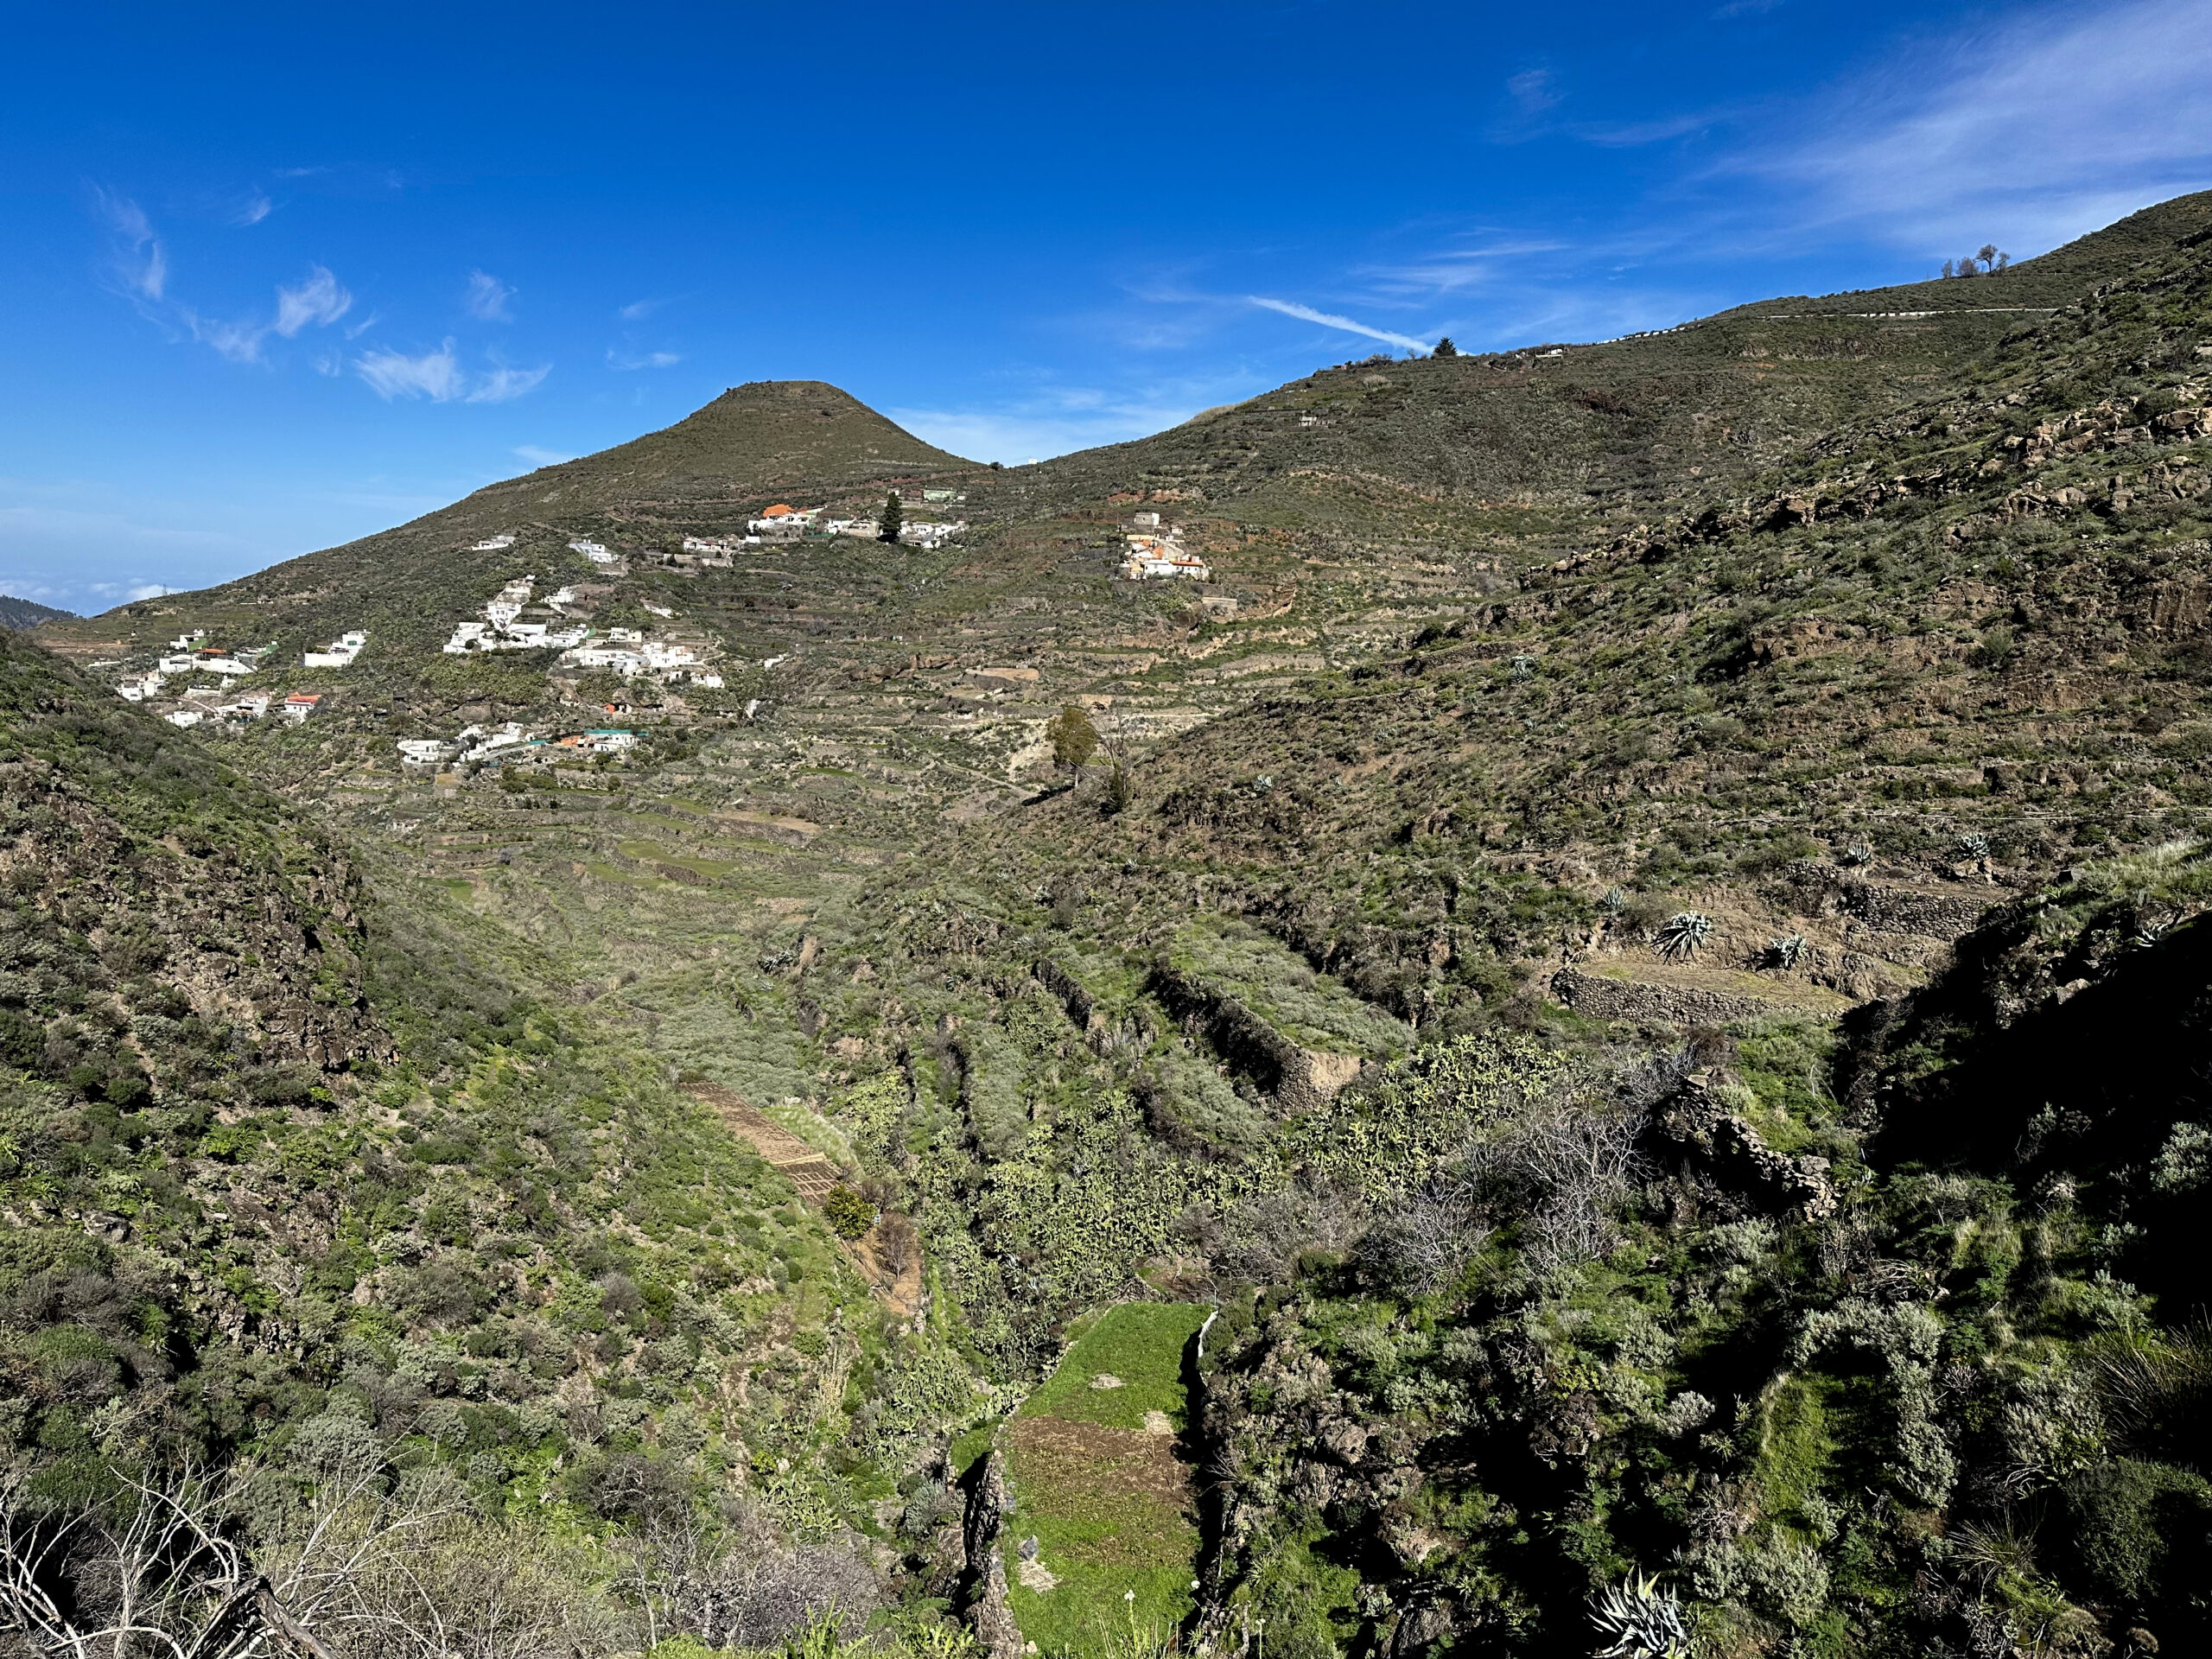
For a while, we followed the GC-220 to the left. However, the official hiking trail bypasses this road on the right-hand side. Eventually, the Camino Barranco Hondo de Arriba branches off to the left from the road, leading you up to the small village of El Tablado, perched above the Barranco Hondo. From here, you have breathtaking views into the deep ravine and across to the opposite side of the valley. Below El Tablado, the hiking trail descends into the ravine.
Route Section: El Tablado to Cuevas de Caballero
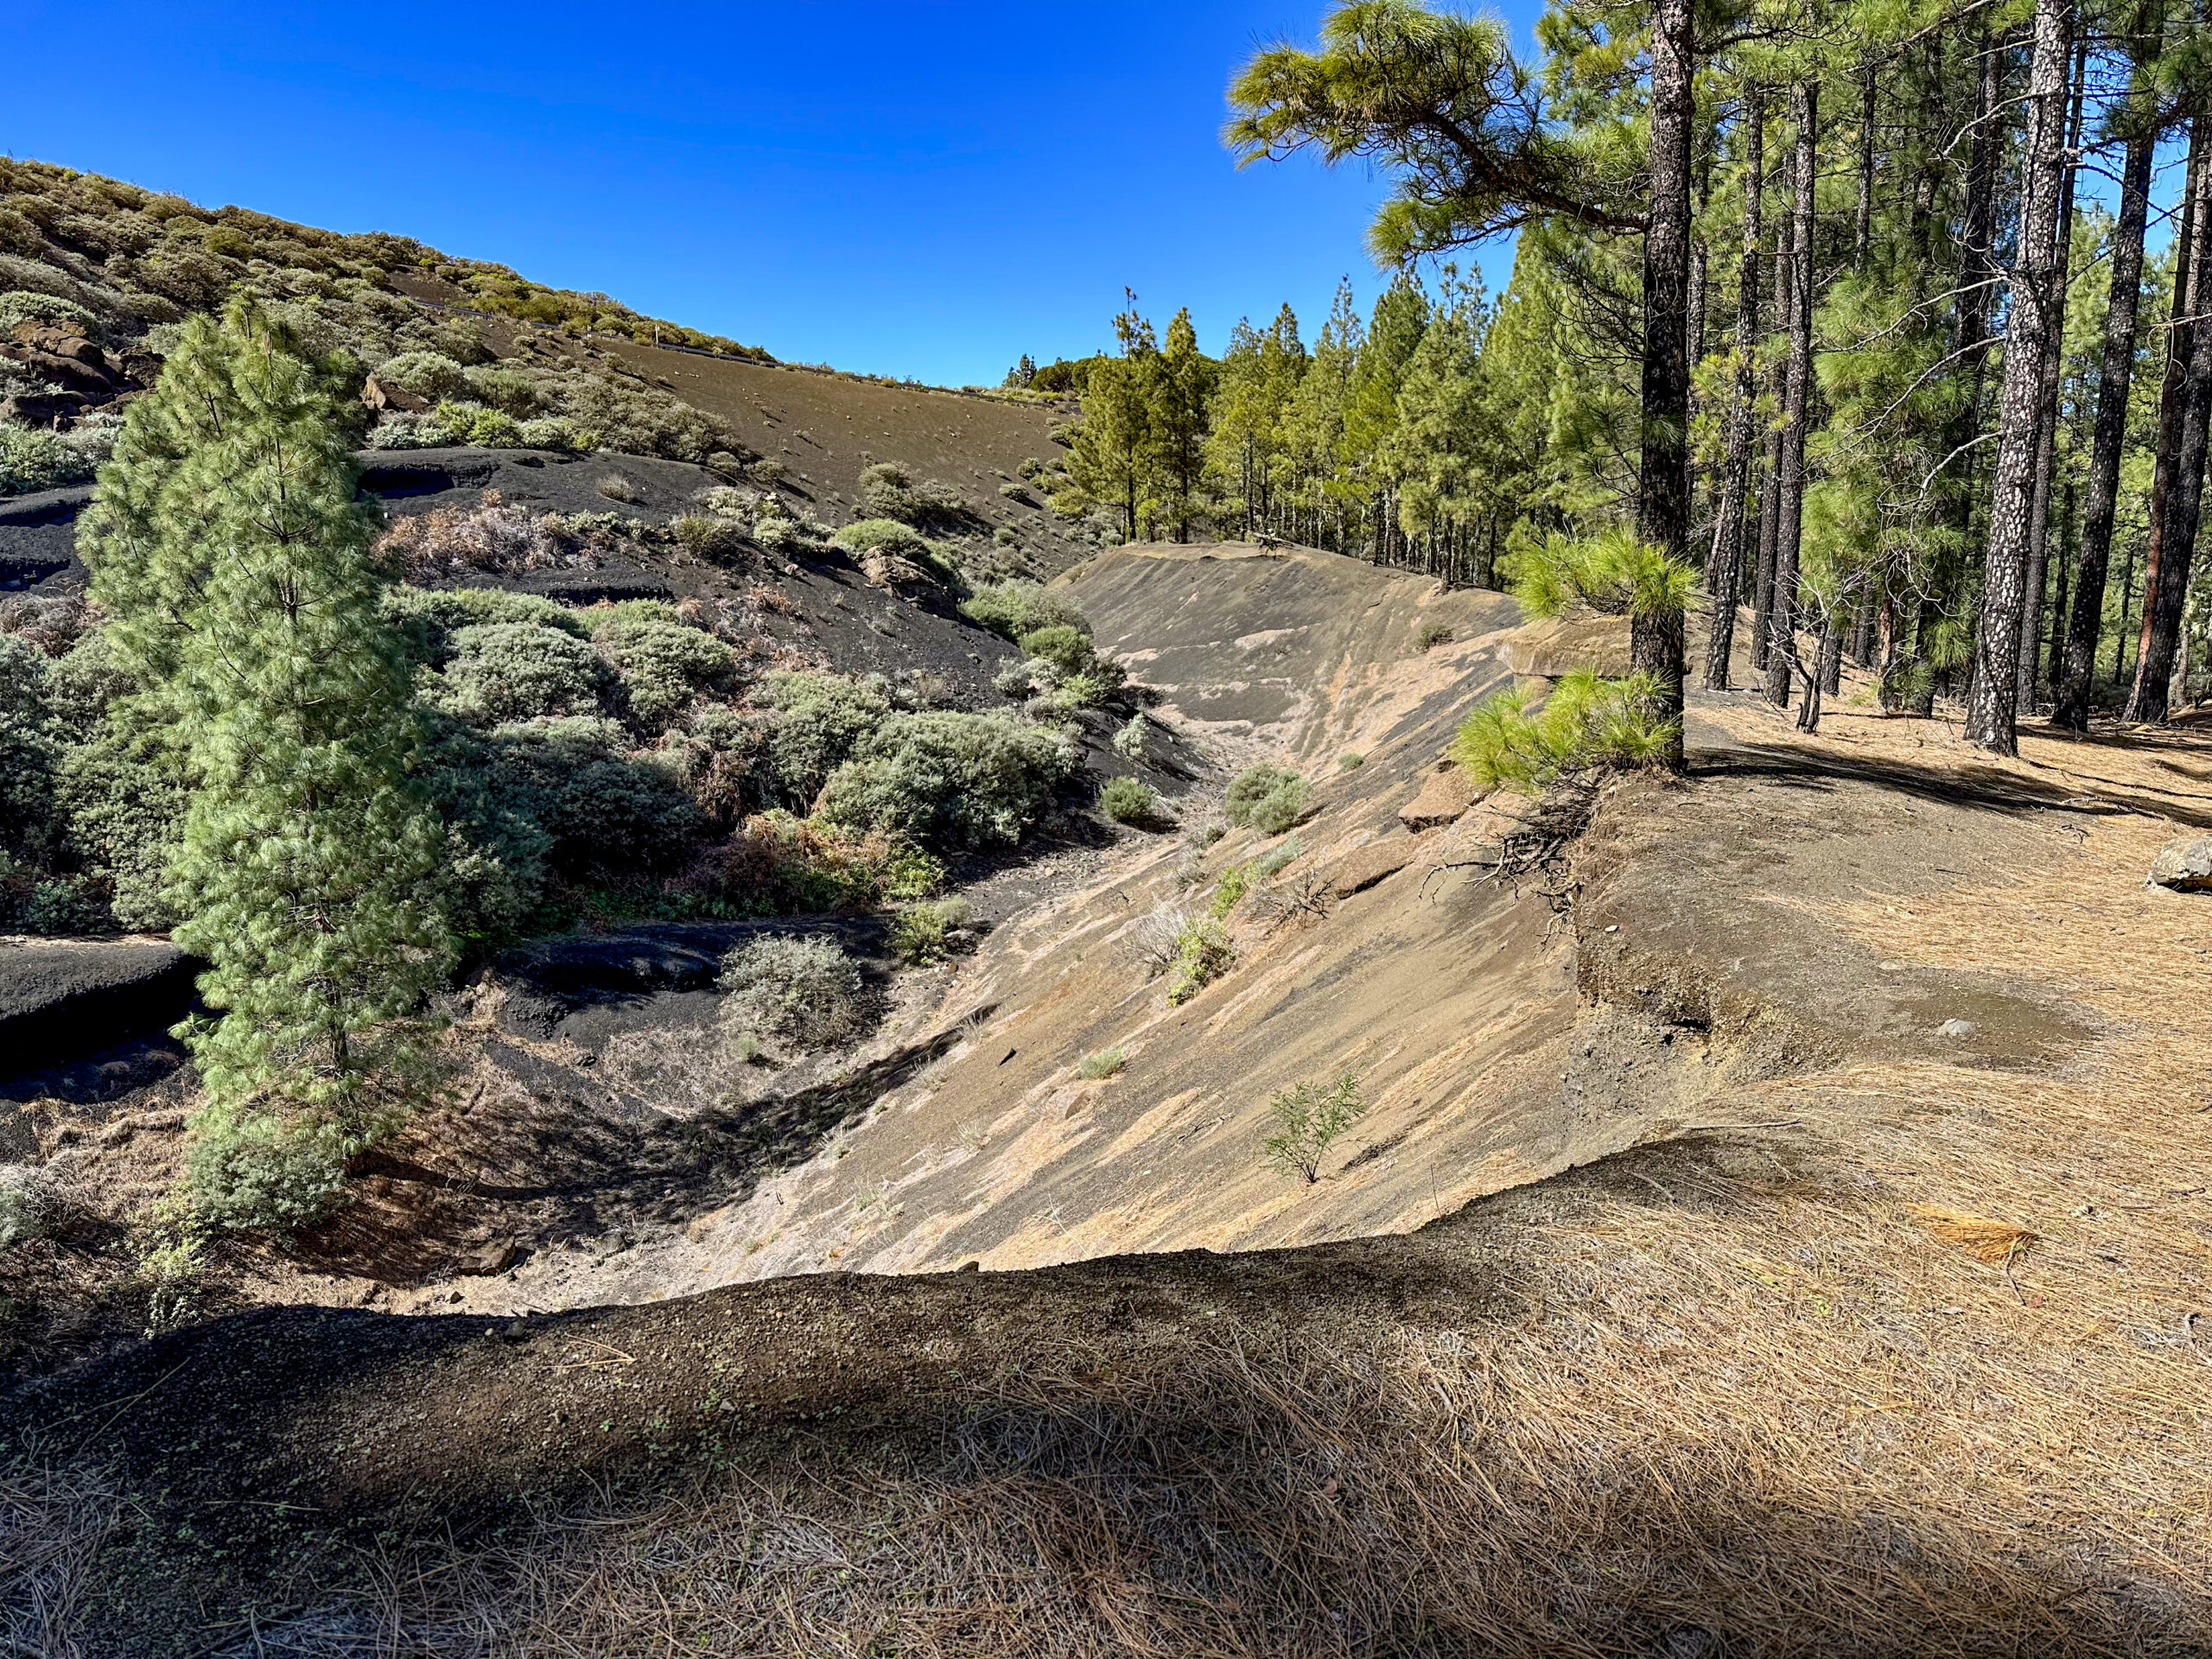
You descend into the deep ravine with spectacular views. If you chose the alternative route and did not follow the hiking trail towards Artenara, your path will now merge with the main hiking route below El Tablado. At the bottom of the Barranco Hondo de Arriba, you leave the main trail to Artenara. A small path branches off to the left, ascending steeply along the ravine. Signposts already indicate the way to the Cuevas de Caballero.
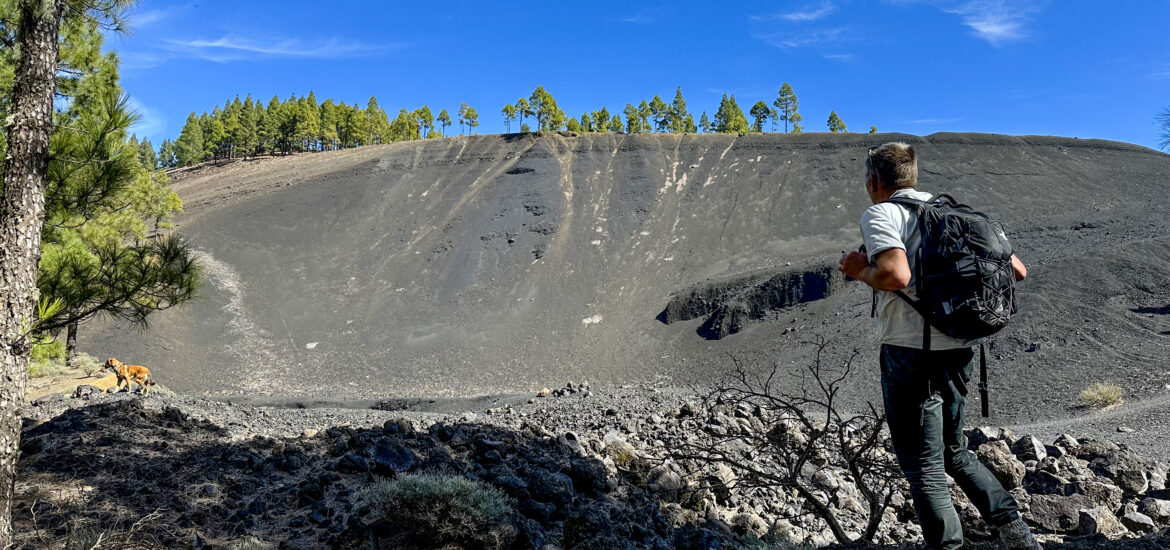
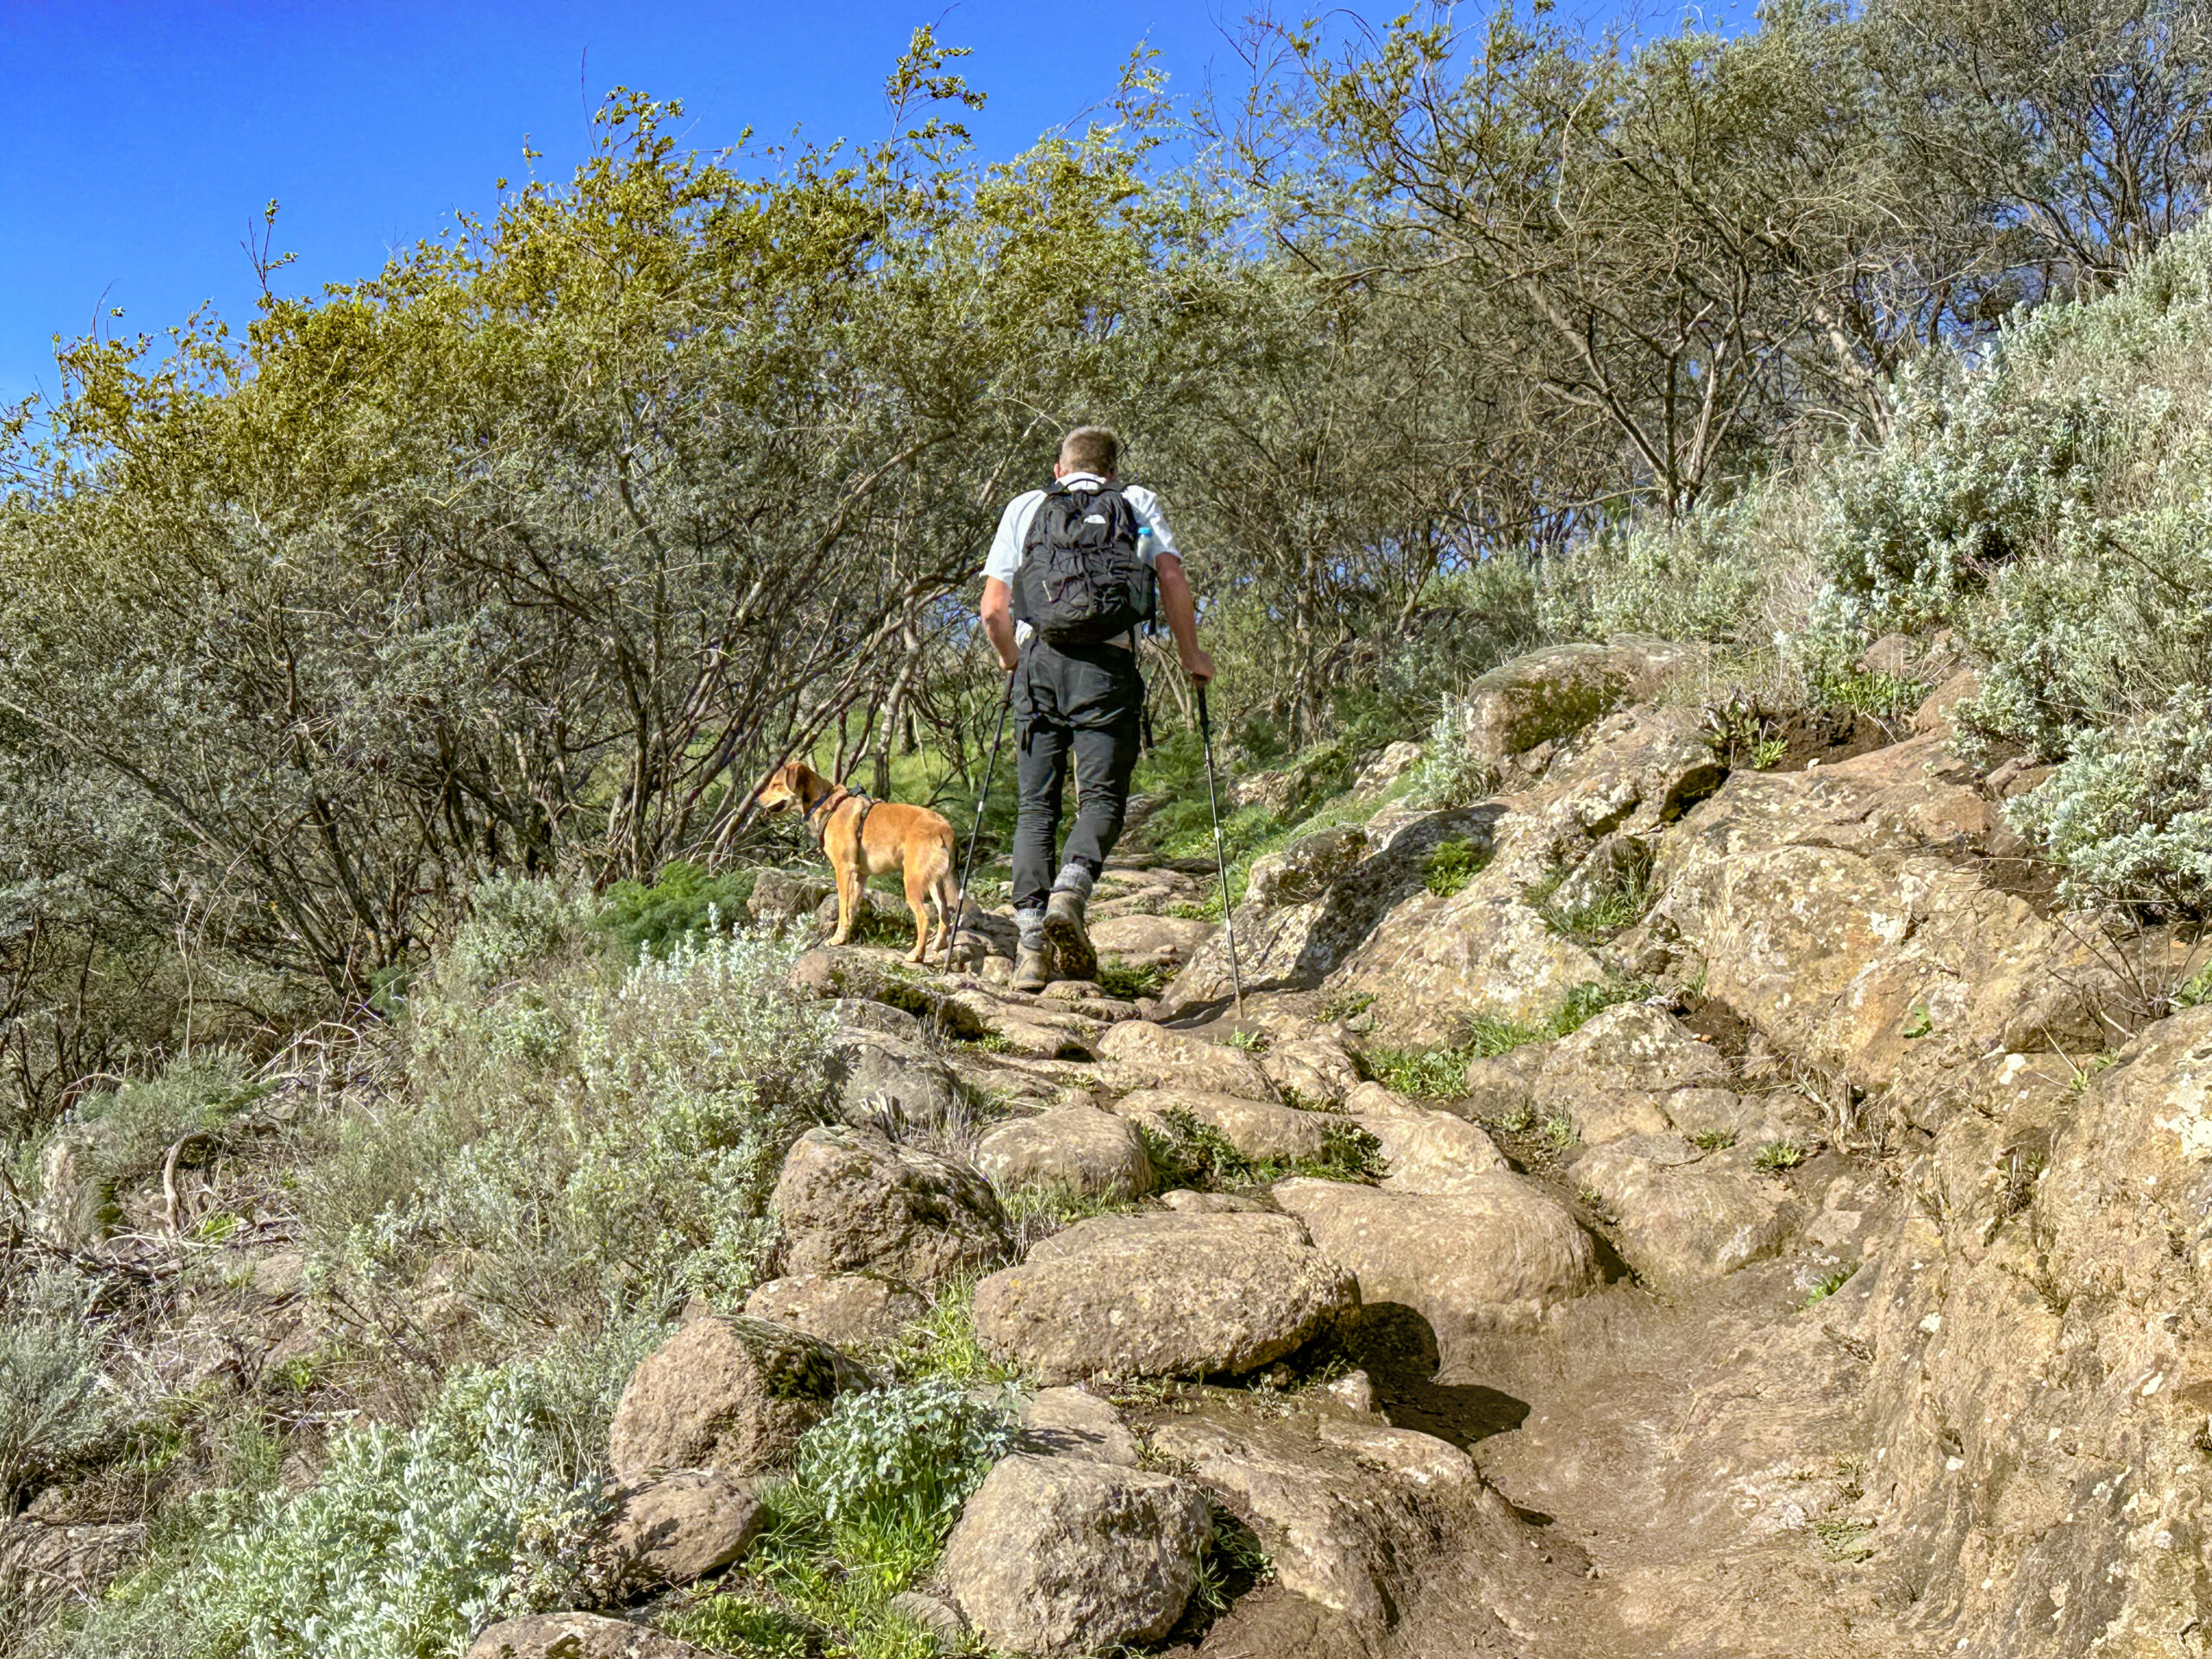
From here, it is only 2.3 kilometres to the caves. However, these two kilometres are quite demanding. The entire stretch is a steep climb. While you can enjoy stunning views when looking back, this part of the hike is quite strenuous. About halfway up the ascent, you cross the GC-21. The path then continues on the right side of the upper ravine. Eventually, the steep trail veers to the right away from the ravine, leading you to the GR-131 ridge path and the Cuevas de Caballero.
Route Section: Cuevas de Caballero to GC-150
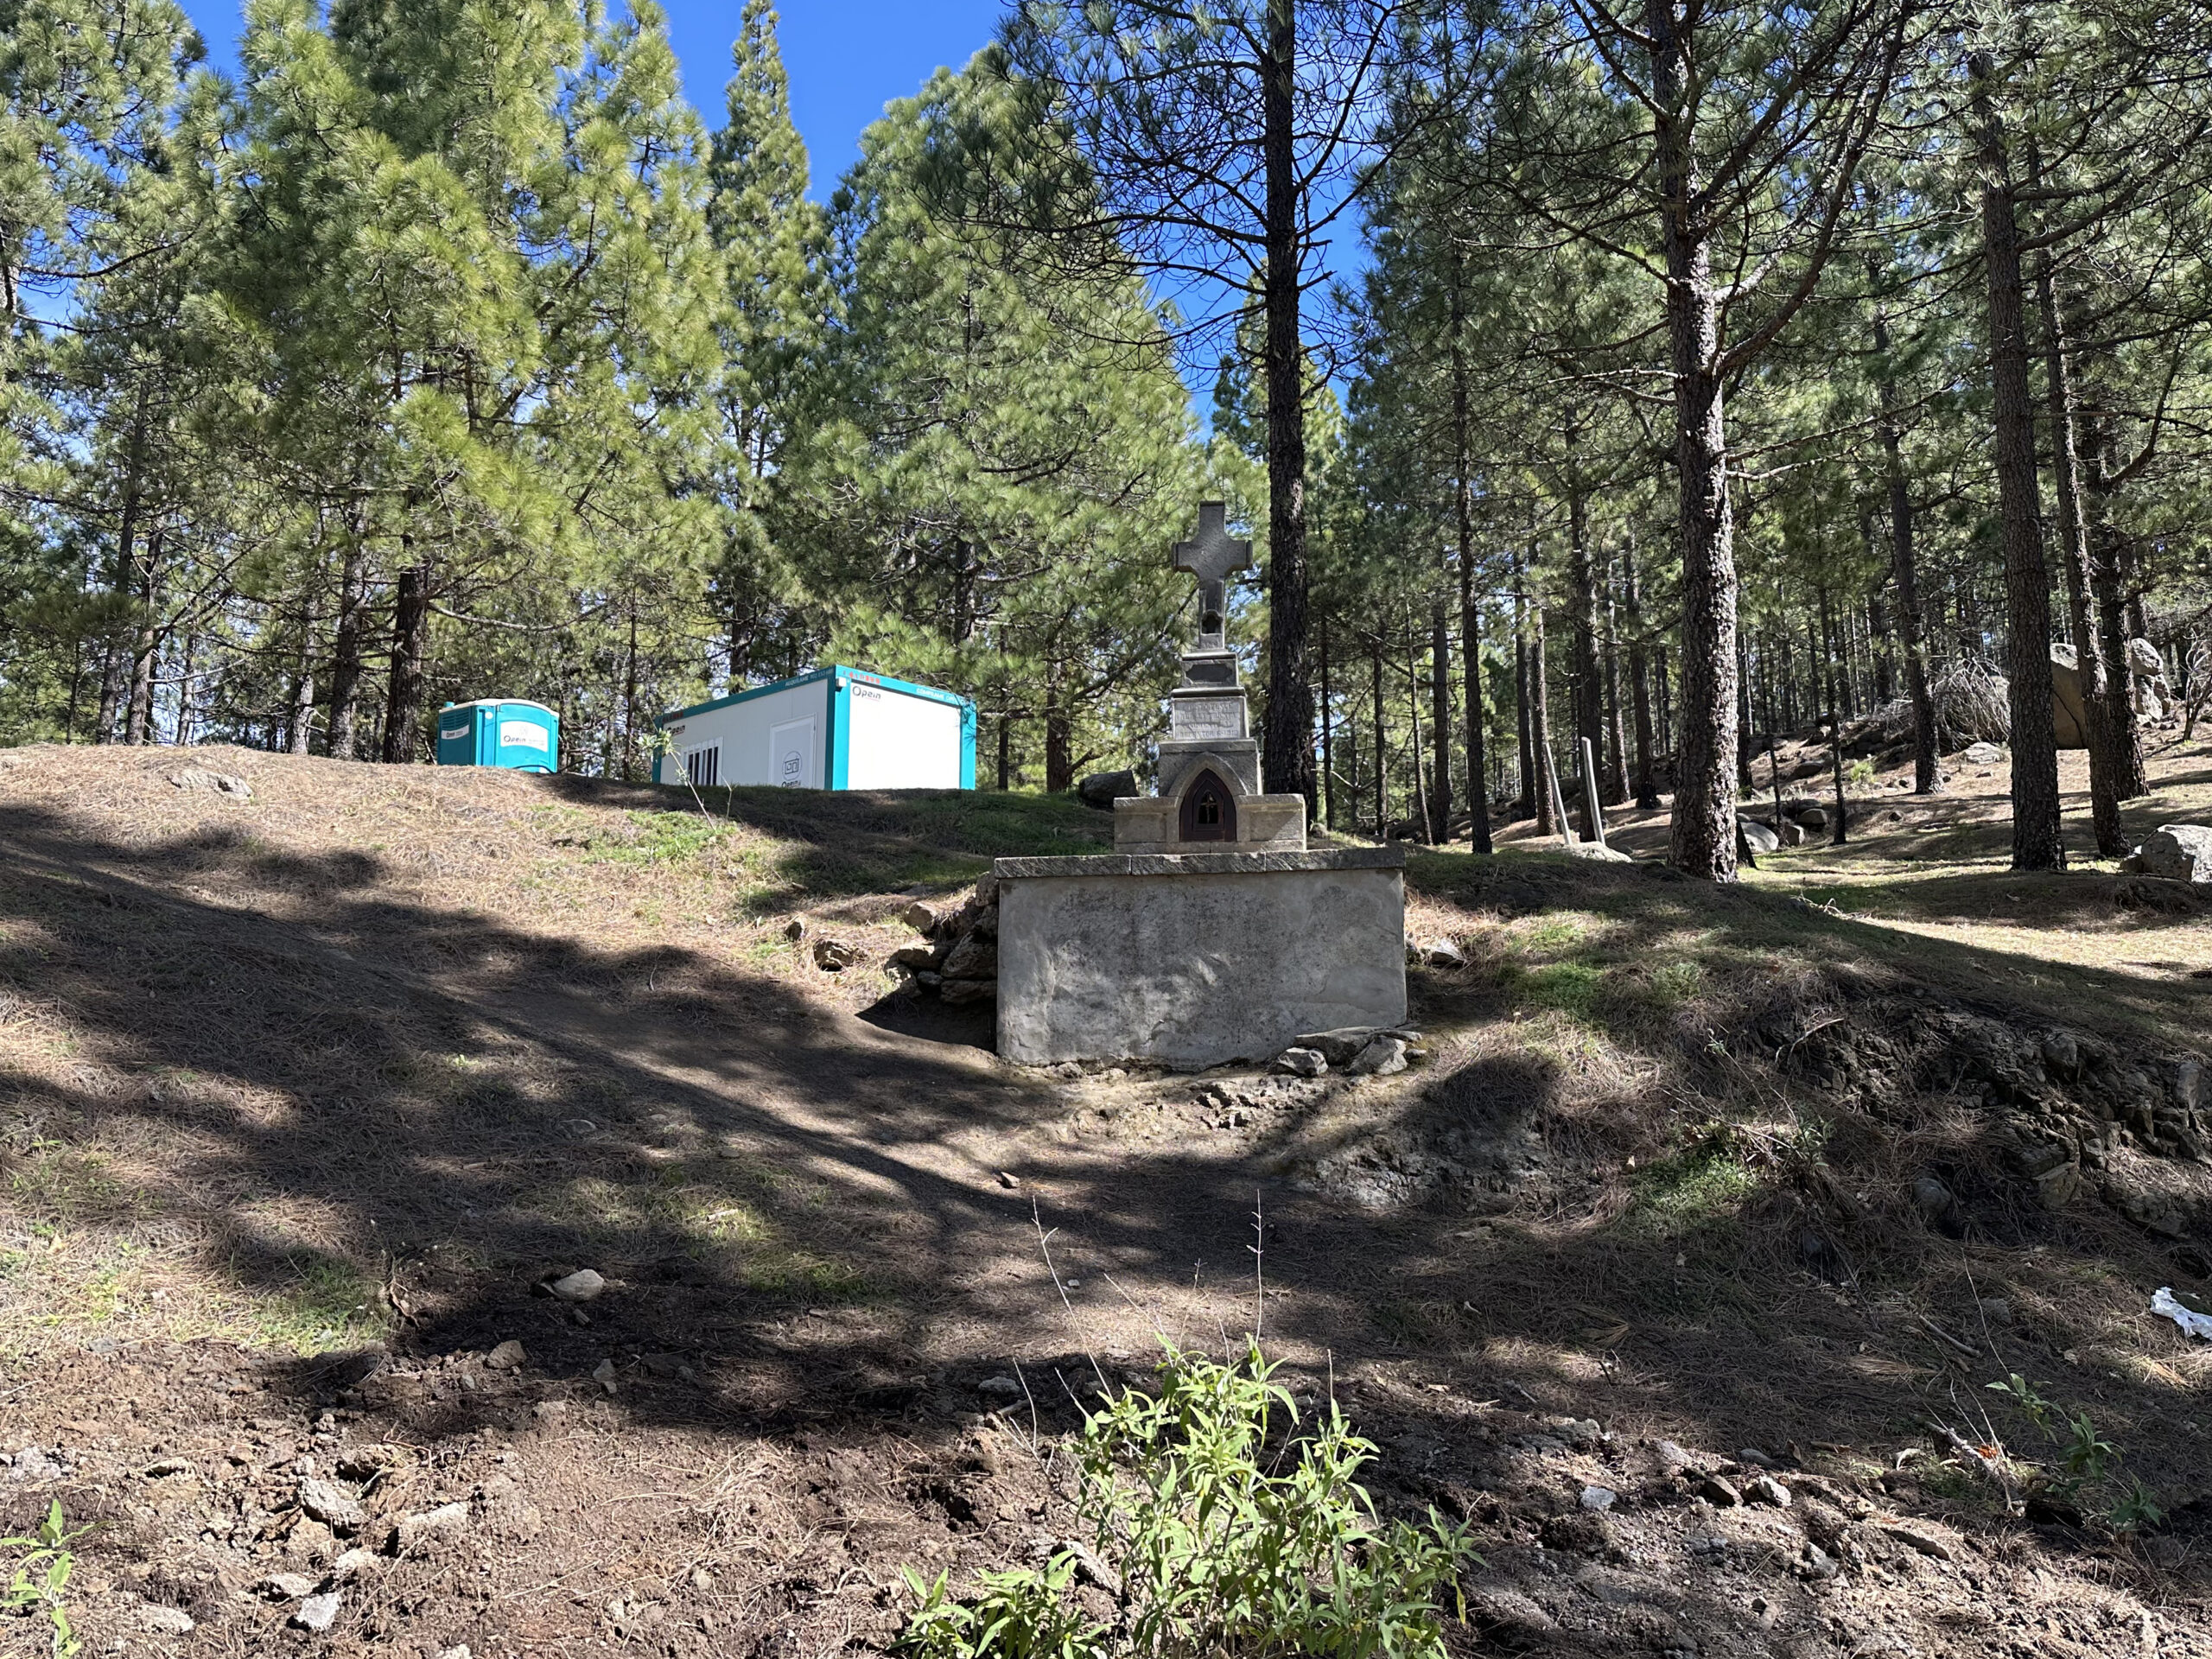
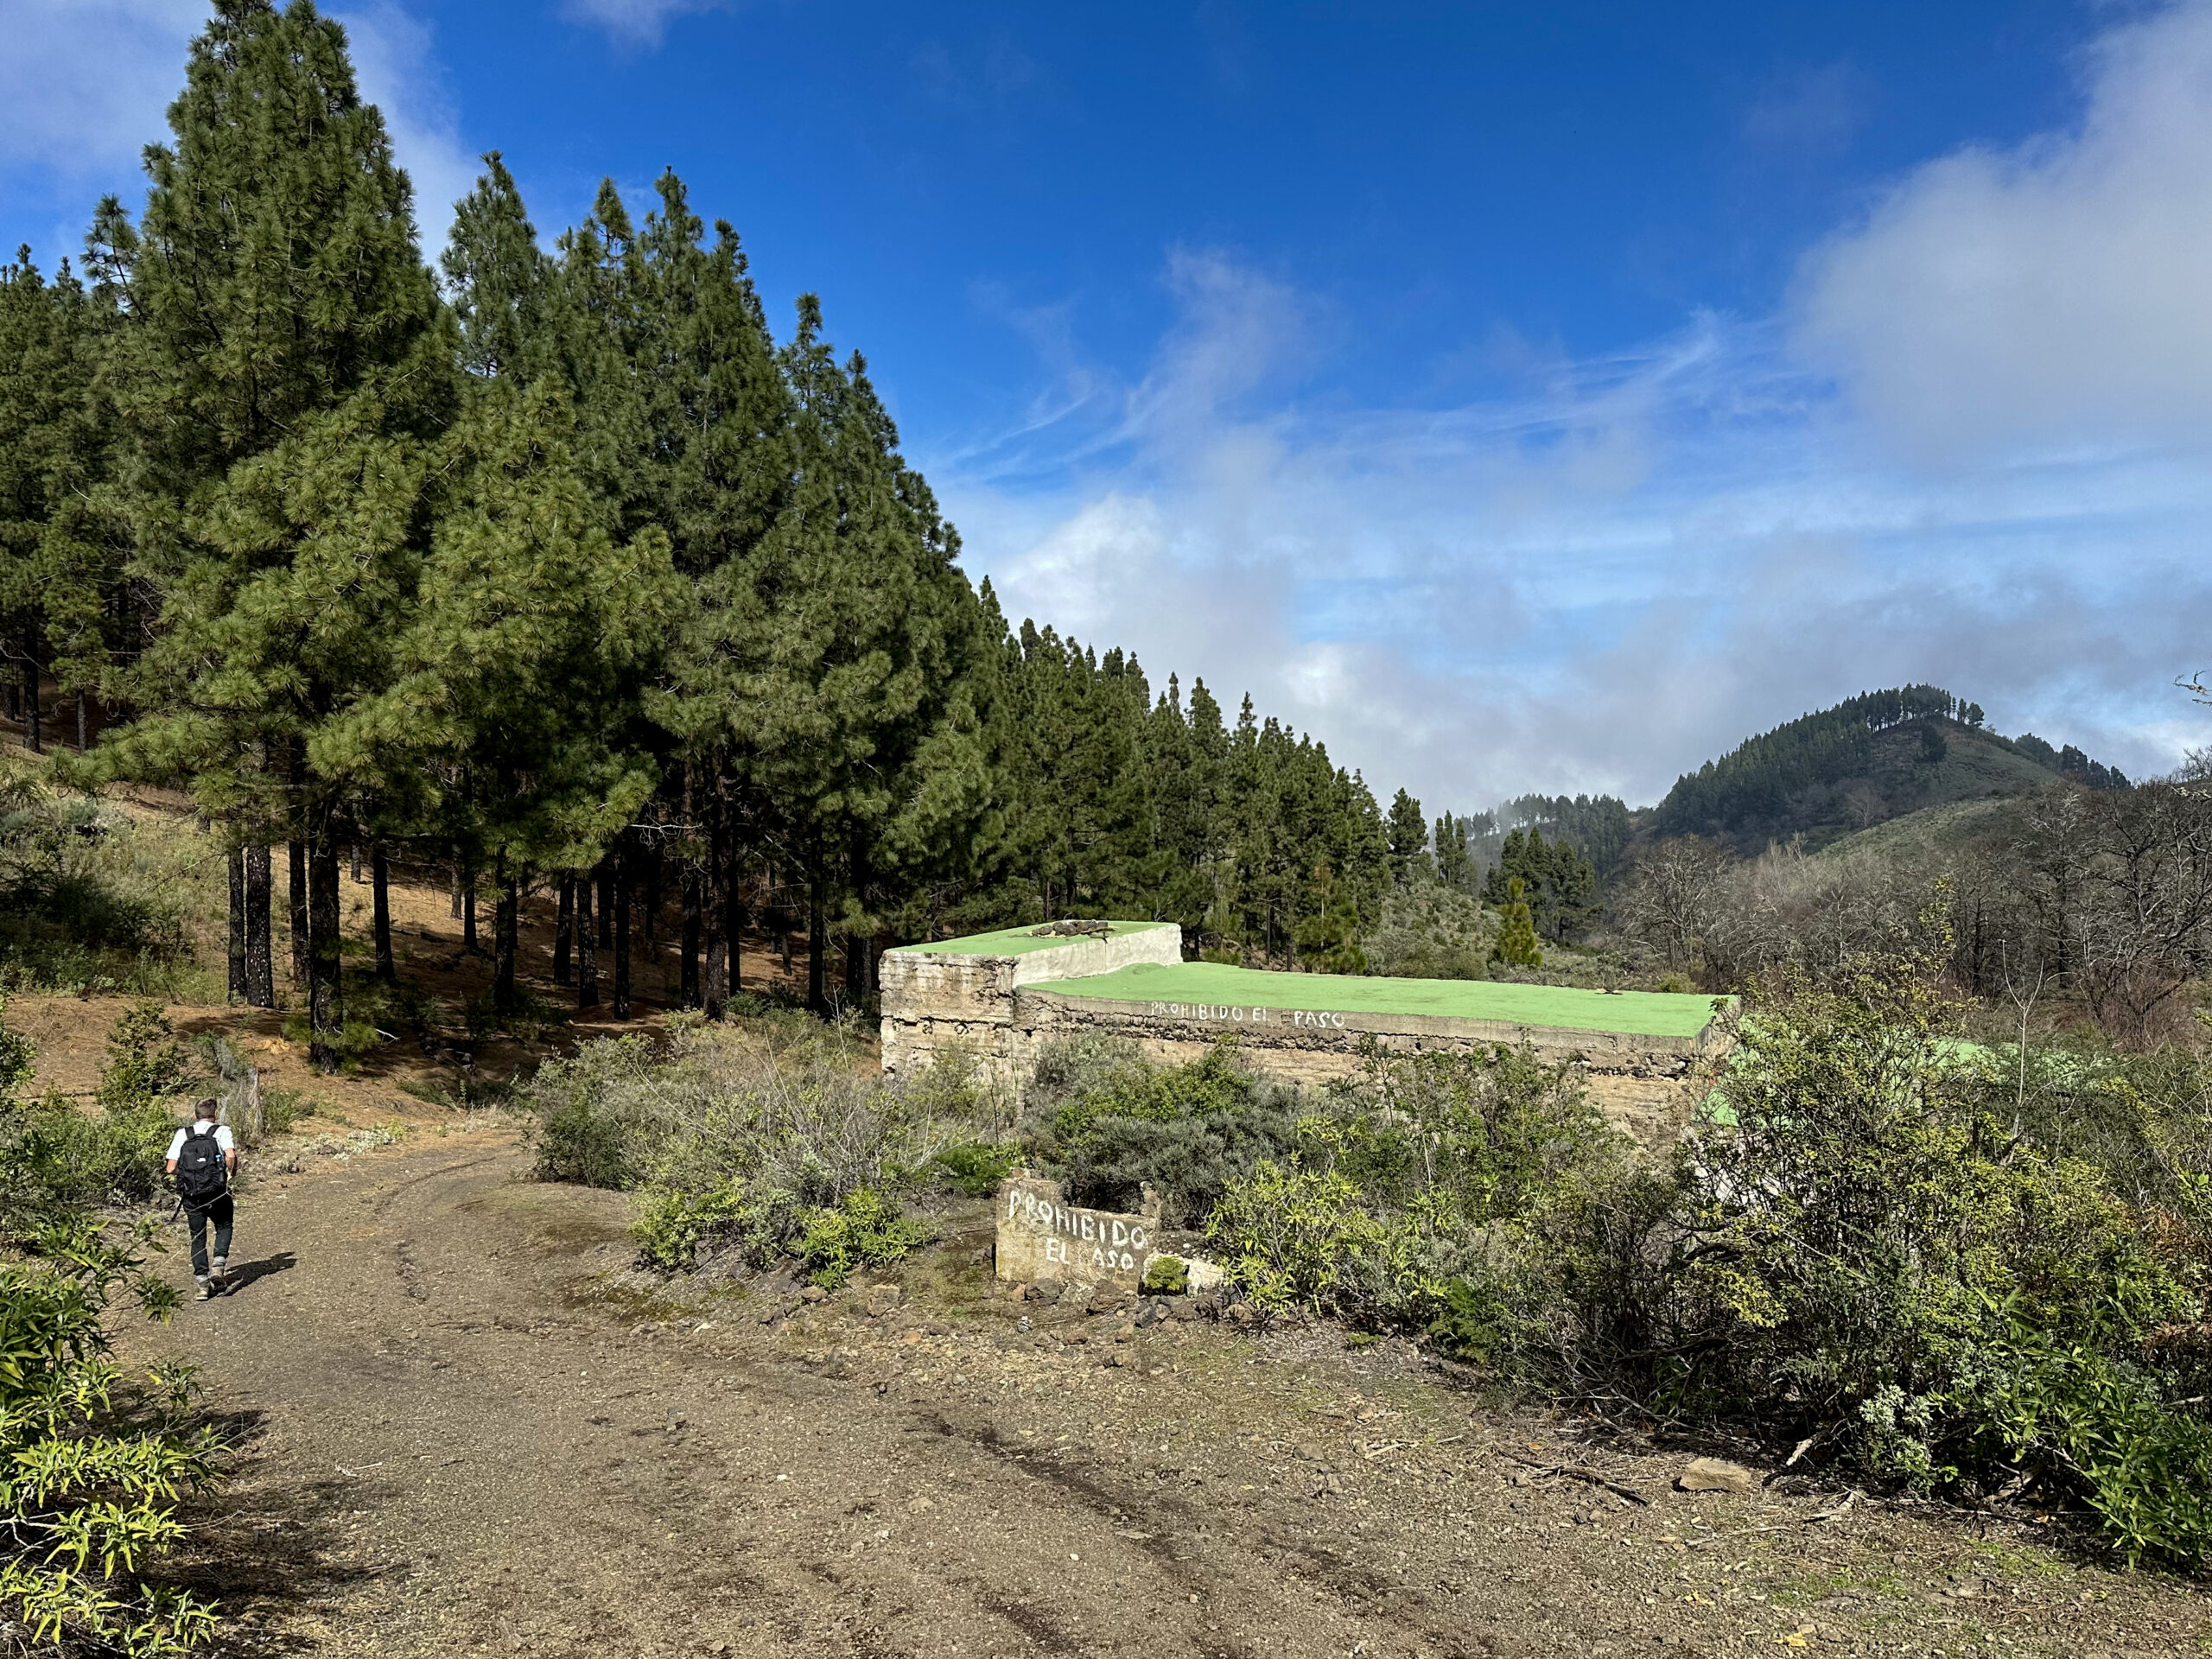
Up on the ridge, you can explore the impressive caves and enjoy the view towards Roque Nublo. This is also an ideal spot for a break. The Cuevas de Caballero are locked but can be viewed from the outside. After visiting the caves, continue to the left and ascend further. Do not follow the high ridge path, but take the wide forest track instead. While this section is not as steep as the previous ascent, the path still leads uphill for a while through the pine forest. You will cross the ravine once again—this time on the opposite side.
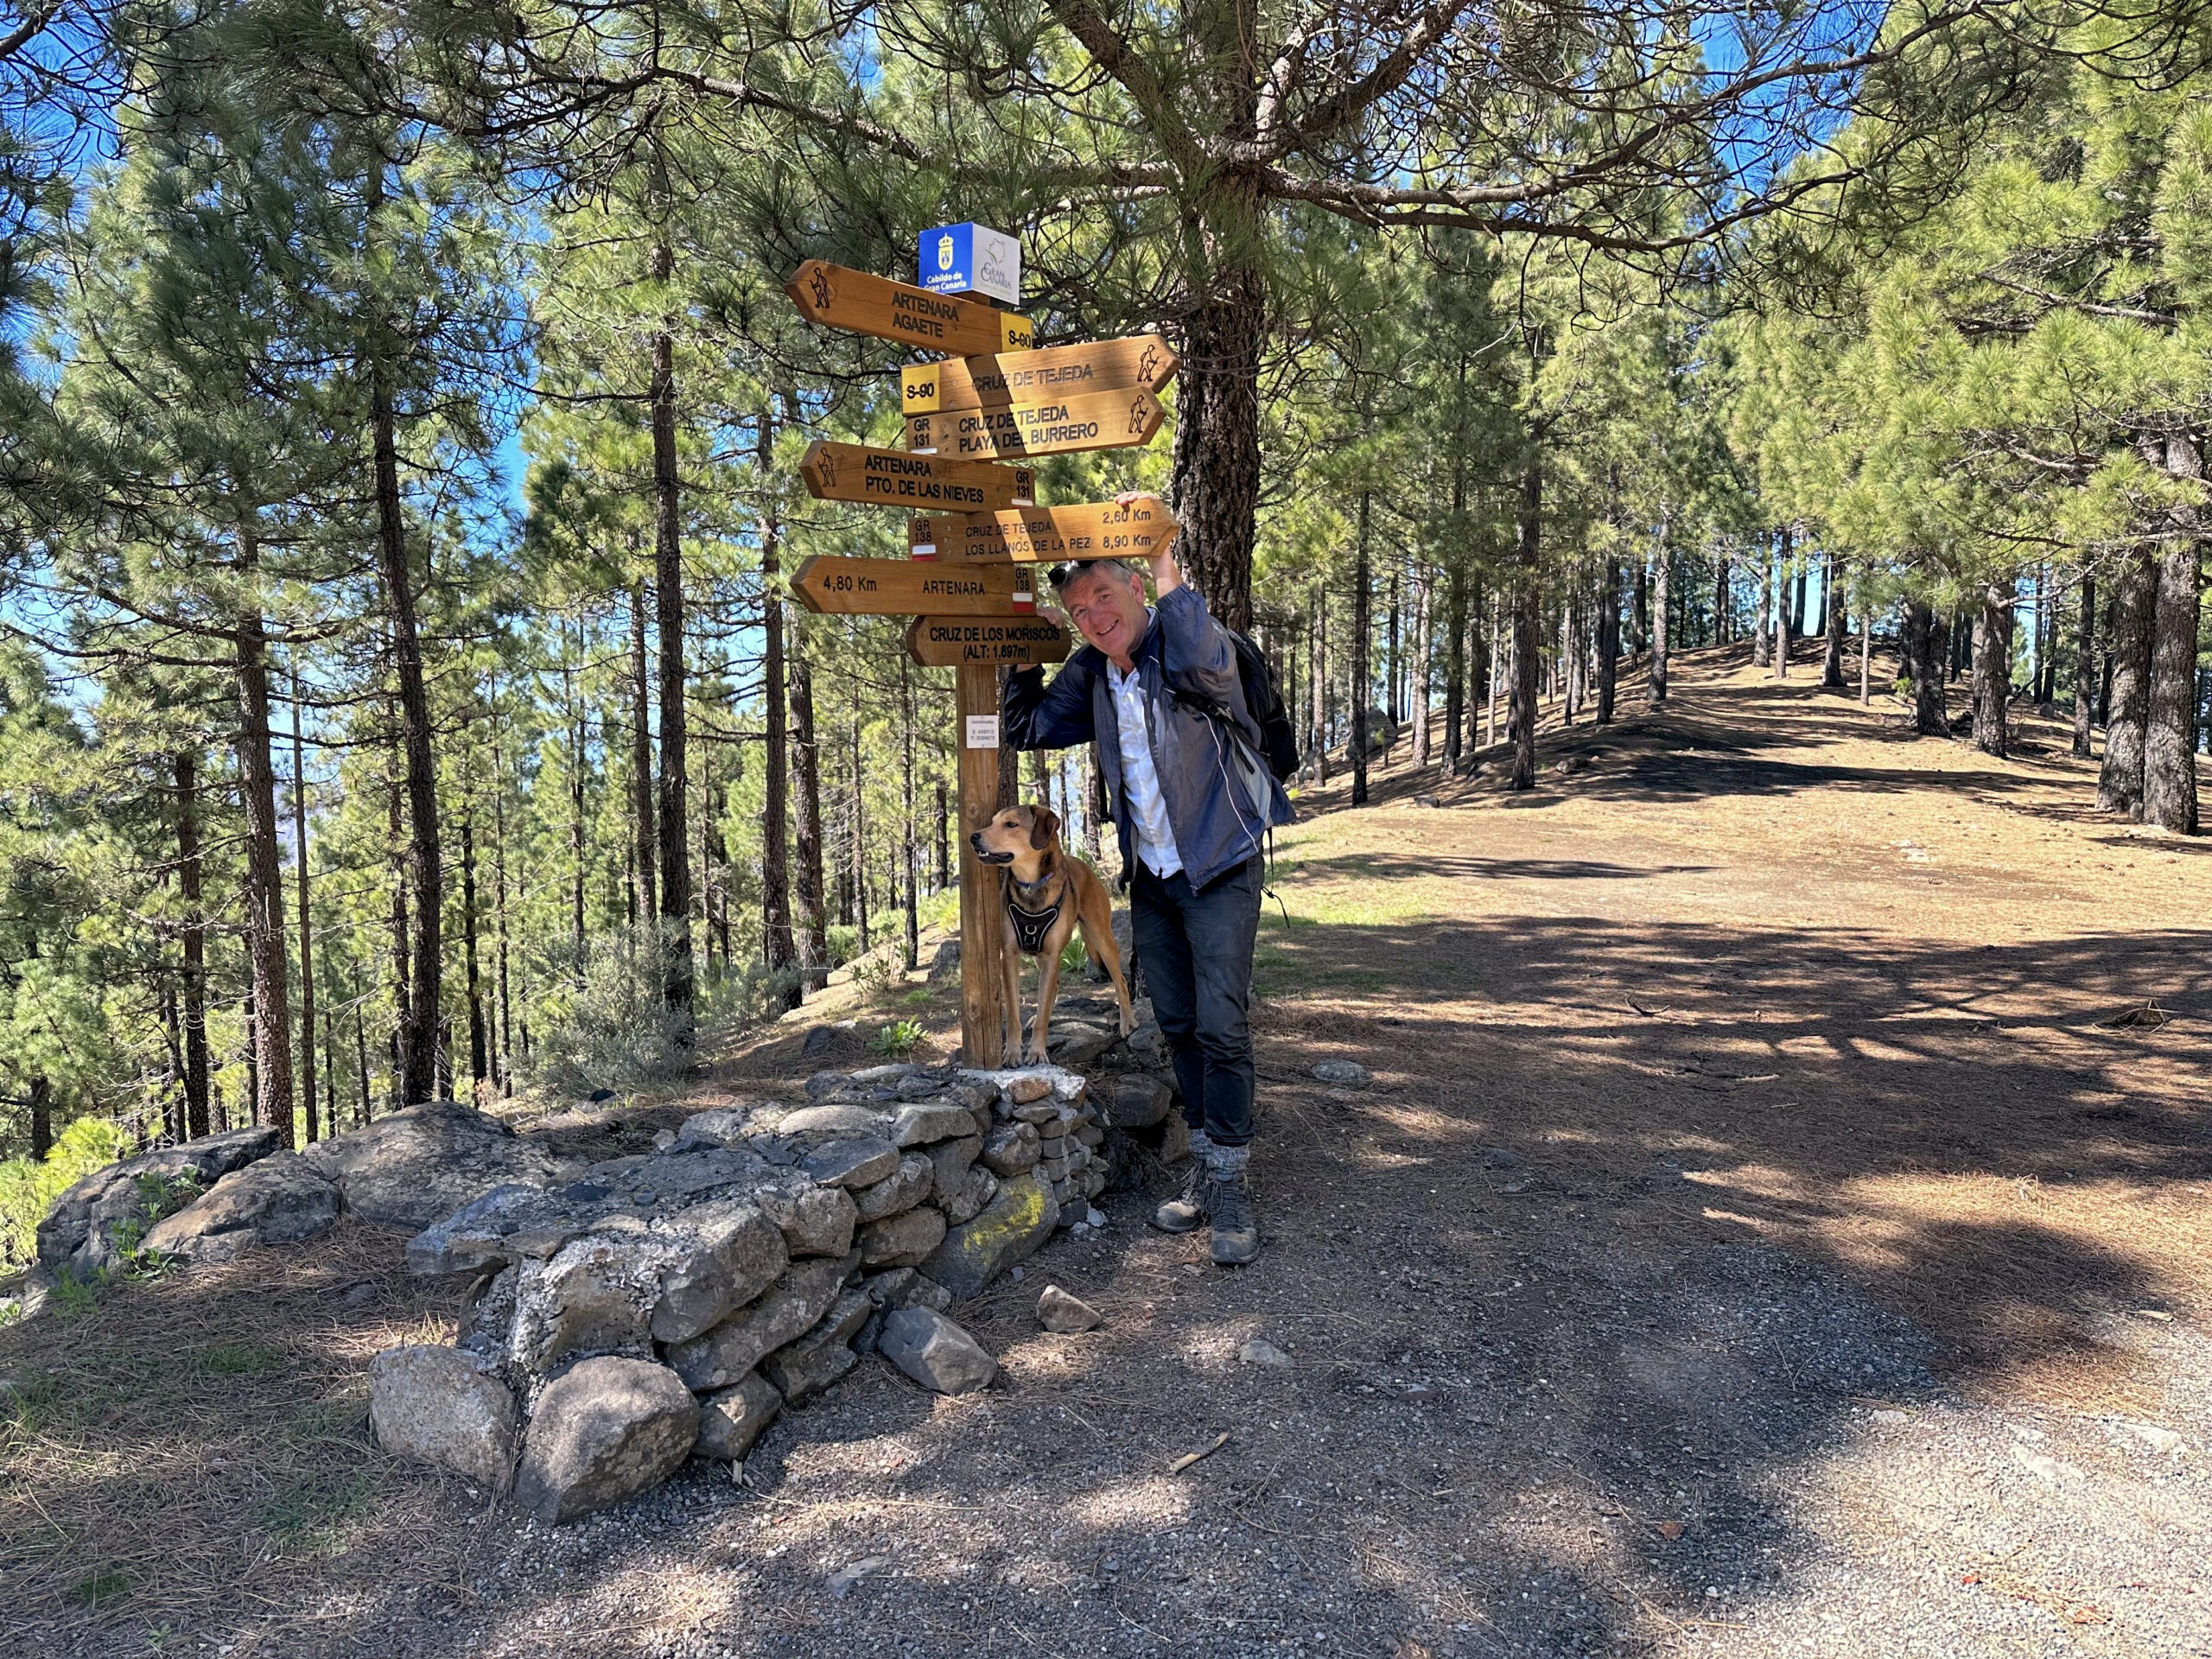
At the top, you reach a hiking junction. Follow the left turn gently downhill through the pine forest. After a short distance, a path branches off to the left, but you continue straight until you reach a fork in the trail at Los Moriscos. Here, take the left route, initially on a forest road, then on a narrow hiking path descending steadily. You arrive at the GC-150 road. Cross the road, where you will find three different paths. Take the leftmost one, which runs just below the GC-150.
Route Section: GC-150 to Pozo Cañada de la Vieja
This path leads further downhill through light pine forest and volcanic terrain. To your right, you will see the impressive El Montañón volcano (1,668 metres), at whose base you continue downhill through the pine forest. Eventually, you reach the GC-21 road. Here, you can either take a path through the forest on the opposite side of the road or follow the GC-21 to the right for a short distance before turning left onto a wide track. Whichever option you choose, you will end up on the broad path that leads to the Pozo Cañada de la Vieja.
A “Pozo” is a traditional well or water source often found in mountainous or rural areas of the island. Since Gran Canaria has few natural rivers, these wells historically served as important water sources, storing water in cisterns or reservoirs. Many of these Pozo facilities are connected to a network of channels or cisterns to transport water over greater distances, particularly in mountainous regions like Gran Canaria.
Route Section: Pozo Cañada de la Vieja to Pozo La Solana
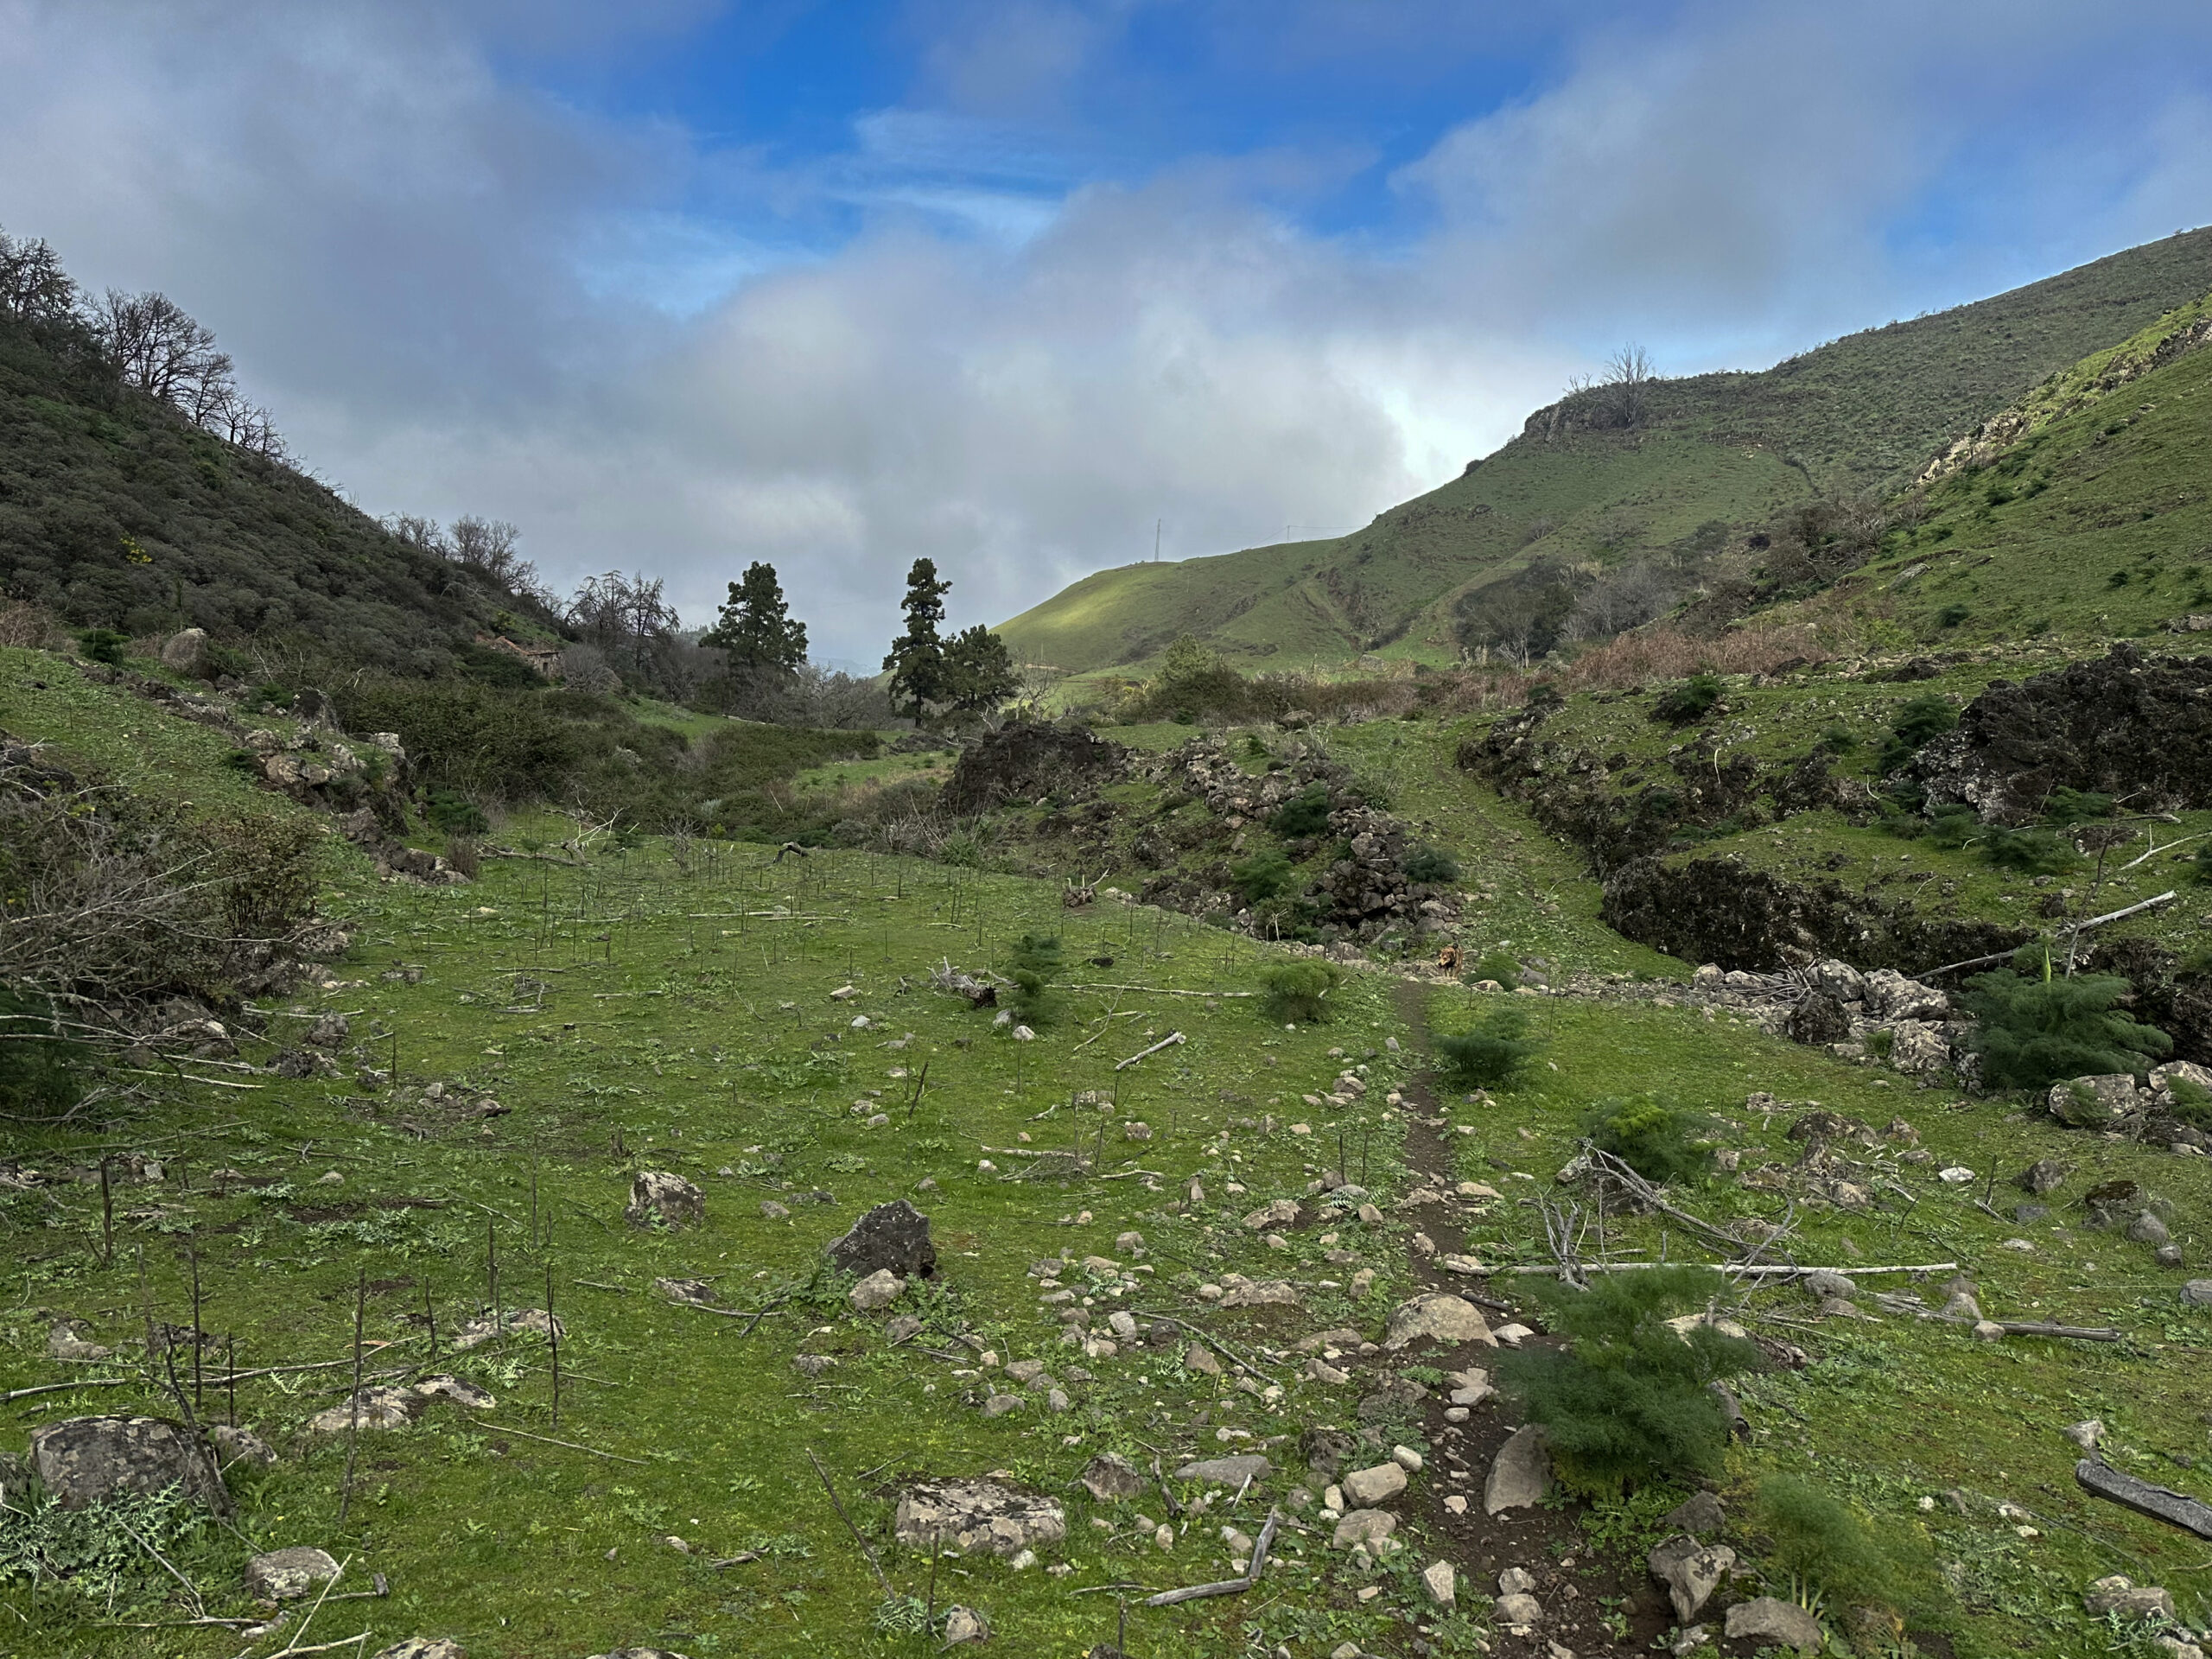
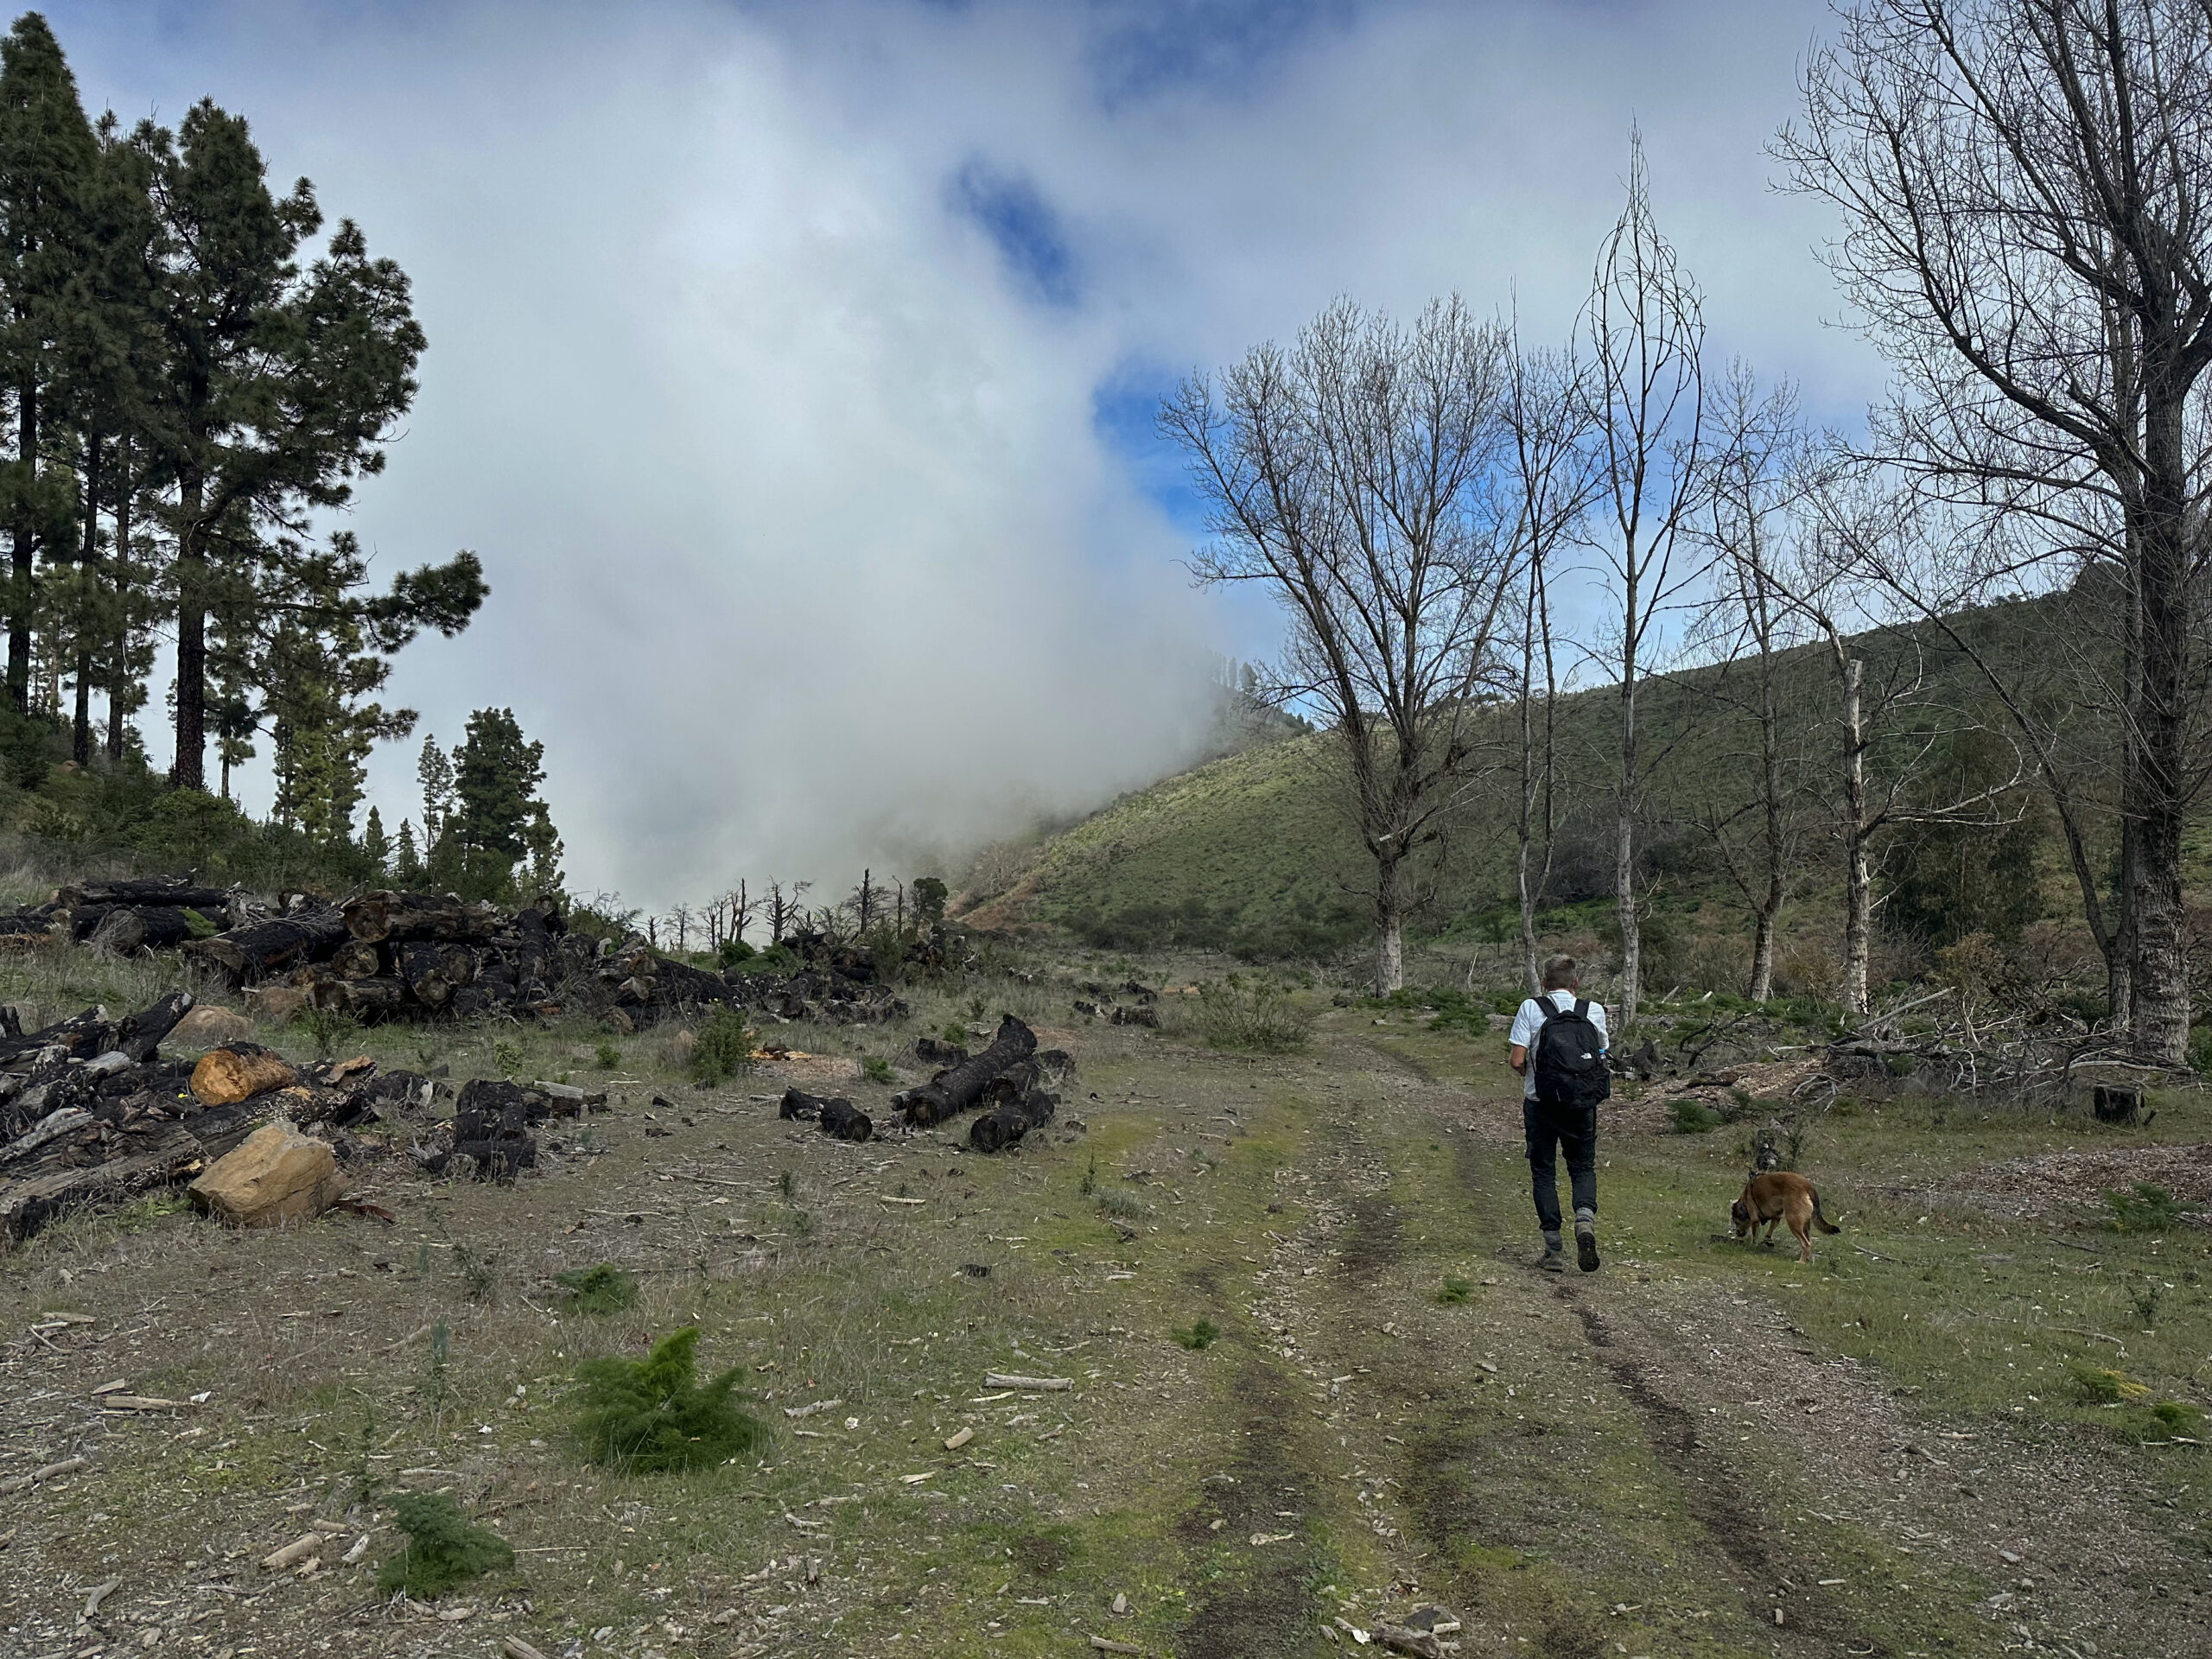
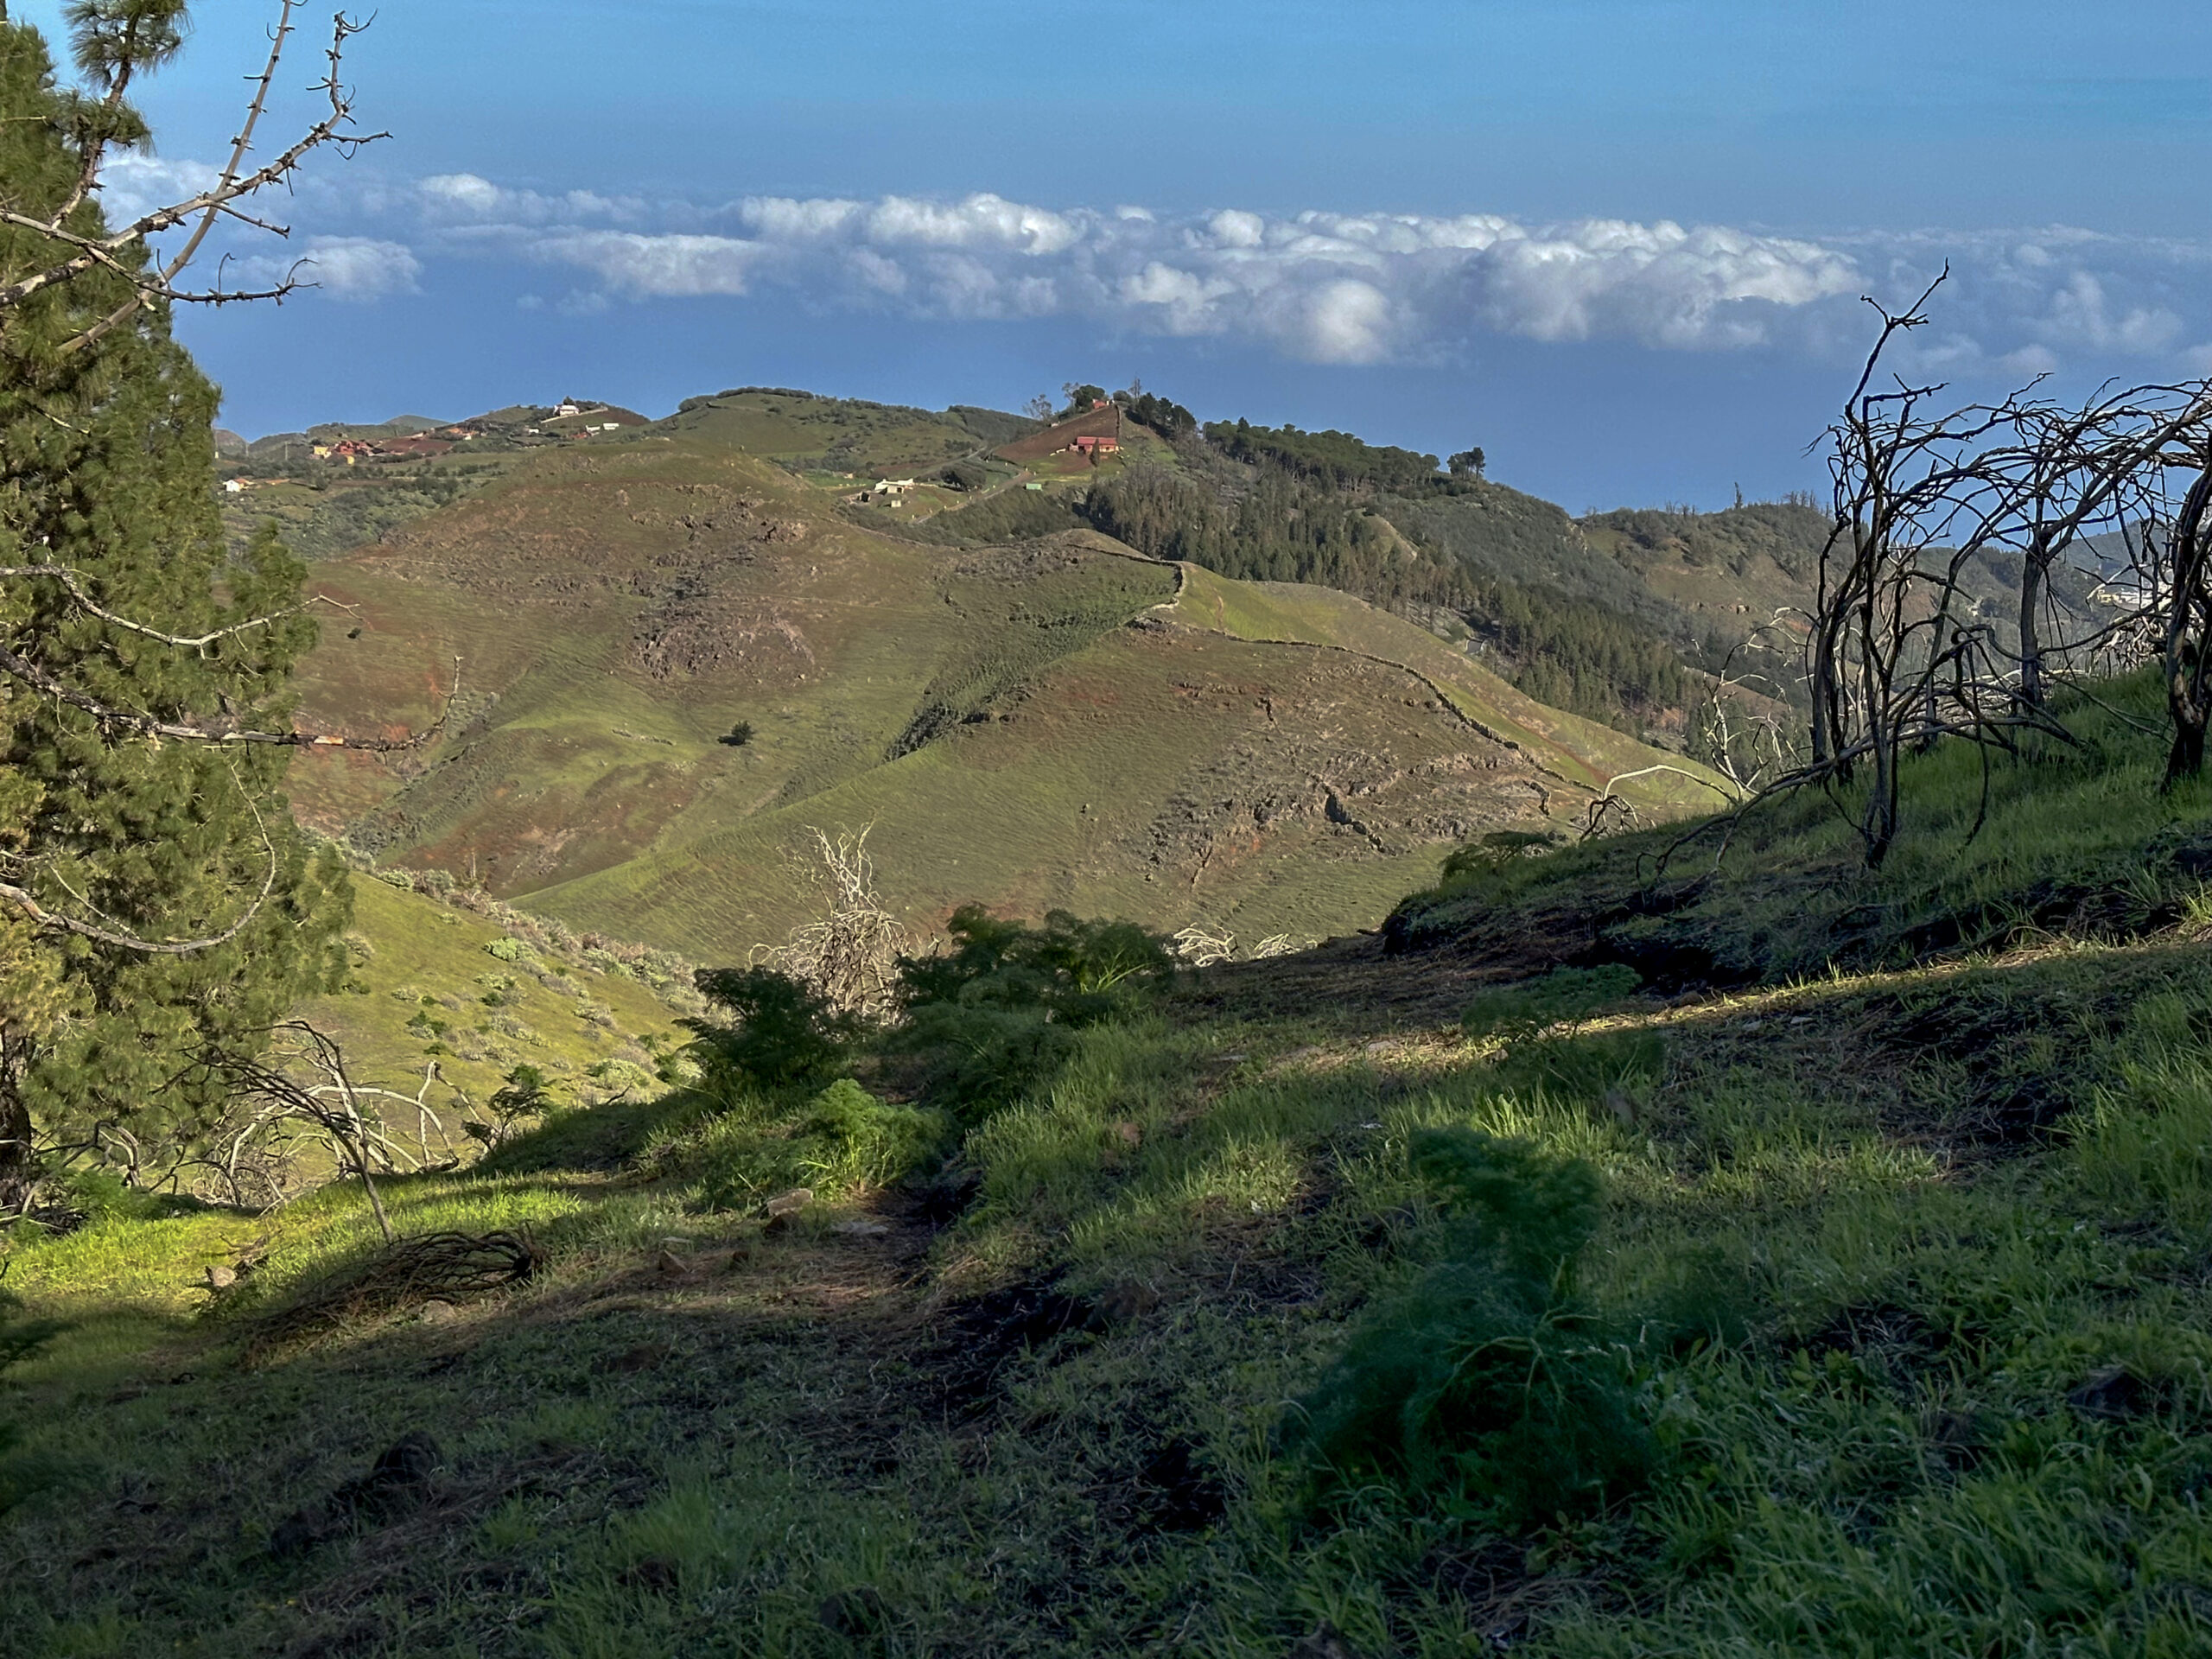
You pass the Pozo and continue for a while descending through the Barranco Agua. The surrounding landscape is somewhat wild but incredibly beautiful. The path is not always easy to find, but as long as you follow the ravine downhill, you cannot get lost. Eventually, you reach a broad forest track, which you follow leftwards downhill. This track takes you in wide hairpin bends to an old, abandoned gallery. If you do not want to follow the full hairpin turns, you can take small shortcuts on steeper paths.

After passing the gallery, a trail continues on the right side of the ravine. However, we chose the path on the left side of the ravine, which can be difficult to find in places. However, as long as you stay on the left side and follow the Barranco Agua, you will remain on track. I have taken this route multiple times and sometimes ended up on the opposite side, but there are always options to return to the left side of the ravine. Eventually, you cross the ravine to the right when you see buildings ahead. From here, a broad forest track leads leftwards in a short time to Pozo La Solana.
Route Section: Pozo La Solana to Fontanales
At Pozo La Solana, you reach a small road that you follow to the right. You are now on the Camino Aguas de Fontanales. This small road gently descends past scattered farmhouses and a cheese dairy. Unfortunately, we had an unpleasant experience here when we were attacked by two aggressive, free-roaming dogs. Fortunately, their owner recalled them just in time, preventing a more serious incident.

Aside from this less pleasant encounter, the Camino Aguas de Fontanales is an enjoyable, varied route with much to see and discover. As you enter Fontanales, the road becomes Calle Montañeta de Fontanales. This street leads past rows of houses and descends to the GC-70. From there, you quickly return to your starting point.

And finally
I hope you enjoyed this extensive hiking circuit from Fontanales to the Cuevas de Caballero. It can also be wonderfully combined with many other hikes around Artenara. Wherever your hiking adventures take you, I wish you great joy along the way.
Dagmar from Siebeninseln